<?xml version="1.0" encoding="utf-8"?><feed xmlns="http://www.w3.org/2005/Atom" ><generator uri="https://jekyllrb.com/" version="3.10.0">Jekyll</generator><link href="https://akindemirsec.github.io/feed.xml" rel="self" type="application/atom+xml" /><link href="https://akindemirsec.github.io/" rel="alternate" type="text/html" /><updated>2026-06-19T06:38:36+00:00</updated><id>https://akindemirsec.github.io/feed.xml</id><title type="html">Akın Demir</title><subtitle>DFIR &amp; Cyber Security Analyst</subtitle><author><name>Akın Demir</name></author><entry><title type="html">DevSecOps Training &amp;amp; Learning Resources</title><link href="https://akindemirsec.github.io/blog/2024/03/27/devsecops-resources/" rel="alternate" type="text/html" title="DevSecOps Training &amp;amp; Learning Resources" /><published>2024-03-27T00:00:00+00:00</published><updated>2024-03-27T00:00:00+00:00</updated><id>https://akindemirsec.github.io/blog/2024/03/27/devsecops-resources</id><content type="html" xml:base="https://akindemirsec.github.io/blog/2024/03/27/devsecops-resources/"><![CDATA[<p>A curated collection of DevSecOps training and learning resources:</p>

<ul>
  <li><a href="https://devsecopsguides.com/">DevSecOps Guides</a> - Comprehensive DevSecOps documentation</li>
  <li><a href="https://www.securecodewarrior.com/">Secure Code Warrior</a> - Secure coding training platform</li>
  <li><a href="https://www.sonarsource.com/knowledge/code-challenges/advent-calendar-2022/">SonarSource Code Challenges</a> - Code security challenges</li>
  <li><a href="https://tryhackme.com/path/outline/devsecops">TryHackMe DevSecOps Path</a> - Hands-on DevSecOps learning path</li>
  <li><a href="https://www.cloudskillsboost.google/paths/76">Google Cloud Skills Boost</a> - Cloud security training</li>
  <li><a href="https://github.com/sottlmarek/DevSecOps">DevSecOps Awesome List</a> - Curated DevSecOps tools and resources</li>
  <li><a href="https://github.com/ErdemOzgen/DevSecOps-Vault">DevSecOps Vault</a> - DevSecOps knowledge base</li>
  <li><a href="https://www.appsecengineer.com/">AppSec Engineer</a> - Application security training</li>
  <li><a href="https://github.com/hahwul/DevSecOps">hahwul/DevSecOps</a> - DevSecOps tools collection</li>
</ul>]]></content><author><name>Akın Demir</name></author><category term="devsecops" /><category term="resources" /><category term="devsecops" /><category term="learning" /><category term="training" /><category term="security" /><summary type="html"><![CDATA[Curated list of DevSecOps training platforms, guides, and open source resources for security-focused CI/CD learning.]]></summary></entry><entry><title type="html">Container Security &amp;amp; Hardening Guide</title><link href="https://akindemirsec.github.io/blog/2024/03/26/container-security-hardening/" rel="alternate" type="text/html" title="Container Security &amp;amp; Hardening Guide" /><published>2024-03-26T00:00:00+00:00</published><updated>2024-03-26T00:00:00+00:00</updated><id>https://akindemirsec.github.io/blog/2024/03/26/container-security-hardening</id><content type="html" xml:base="https://akindemirsec.github.io/blog/2024/03/26/container-security-hardening/"><![CDATA[<h2 id="what-is-a-container">What is a Container?</h2>

<p>A container is an isolated environment for your code. It has no knowledge of your operating system or your files. Containers have everything that your code needs in order to run, down to a base operating system.</p>

<h2 id="what-is-container-security">What is Container Security?</h2>

<p>Container security refers to measures and practices taken to ensure the safety and integrity of containers. It comprises everything from the applications inside the containers to the infrastructure they run on. Base image security and quality are critical to ensure that any derivative images come from a trusted source.</p>

<h2 id="security-standards">Security Standards</h2>

<ol>
  <li><strong>CIS Docker Benchmark</strong> - Guidelines for securing Docker containers covering runtime, daemon config, image security, networking, and logging</li>
  <li><strong>NIST SP 800-190</strong> - Container security challenges and best practices</li>
  <li><strong>Docker Security Best Practices</strong> - Practical, Docker-specific guidelines</li>
  <li><strong>PCI DSS / HIPAA</strong> - Compliance standards with specific container guidance</li>
  <li><strong>OWASP</strong> - Application security perspective for containers</li>
  <li><strong>ISO/IEC 27001</strong> - Broad information security framework applicable to Docker environments</li>
</ol>

<h2 id="core-threats">Core Threats</h2>

<ol>
  <li><strong>Data Breaches</strong> - Unauthorized access to sensitive data within containers</li>
  <li><strong>Insecure Base Images</strong> - Outdated or unpatched base images introduce vulnerabilities</li>
  <li><strong>Untrusted Image Registries</strong> - Malicious images from untrusted sources</li>
  <li><strong>Container Escape Vulnerabilities</strong> - Breaking out of the container to access the host</li>
  <li><strong>Misconfigurations</strong> - Excessive privileges or weak security settings</li>
  <li><strong>Insider Threats</strong> - Unauthorized insiders exploiting privileged container environments</li>
  <li><strong>Third-Party Vulnerabilities</strong> - Vulnerable components integrated into containers</li>
  <li><strong>Container Orchestration</strong> - Misconfigurations in Kubernetes and service mesh tools</li>
</ol>

<h2 id="types-of-security-solutions">Types of Security Solutions</h2>

<h3 id="container-monitoring">Container Monitoring</h3>

<p>Tools like Dynatrace, Datadog, Prometheus, Grafana, Elasticsearch and cAdvisor provide performance metrics, real-time log streaming, anomaly detection, and alerting.</p>

<h3 id="container-scanning">Container Scanning</h3>

<p>Image scanners identify vulnerabilities, misconfigurations, and security issues within container images and their runtime environments.</p>

<h3 id="application-level-scanning">Application-Level Scanning</h3>

<ul>
  <li><strong>SCA</strong> (Software Composition Analysis) - Scans dependencies for vulnerabilities</li>
  <li><strong>SAST</strong> (Static Application Security Testing) - Analyzes source code before compile (white box)</li>
  <li><strong>DAST</strong> (Dynamic Application Security Testing) - Tests running applications (black box)</li>
  <li><strong>SBOM</strong> (Software Bill of Materials) - Lists all components for supply chain risk assessment</li>
</ul>

<h2 id="container-security-architecture">Container Security Architecture</h2>

<h3 id="cicd-build-environment">CI/CD Build Environment</h3>
<p>Automated tests must ensure images don’t include outdated or insecure components. The CI/CD infrastructure itself must be secured to prevent supply chain attacks.</p>

<h3 id="container-registries">Container Registries</h3>
<p>Central repositories for storing and scanning container images. Treat images as immutable artifacts. This allows quick replacement or rollback of high-risk containers.</p>

<h3 id="runtime-environments">Runtime Environments</h3>
<p>Implement security policies governing container behavior at runtime. Monitor and manage resources to prevent abuse.</p>

<h3 id="container-orchestration">Container Orchestration</h3>
<p>Kubernetes is crucial but complex. Misconfigurations can allow attackers to compromise nodes or the entire cluster.</p>

<h2 id="container-networking-security">Container Networking Security</h2>

<p>Strategies for secure container networking:</p>

<p><strong>1. Network Isolation</strong></p>
<ul>
  <li>Microsegmentation - Divide network into isolated segments</li>
  <li>Container Network Policies (CNPs) - Granular access rules per container</li>
</ul>

<p><strong>2. Encryption</strong></p>
<ul>
  <li>TLS for data in transit</li>
  <li>Encrypt container images at rest</li>
</ul>

<p><strong>3. Authentication &amp; Authorization</strong></p>
<ul>
  <li>Mutual TLS (mTLS) between containers</li>
  <li>Role-Based Access Control (RBAC)</li>
</ul>

<p><strong>4. Monitoring &amp; Logging</strong></p>
<ul>
  <li>Monitor for suspicious traffic patterns</li>
  <li>Enable logging for all network activity</li>
</ul>

<p><strong>5. Tools</strong></p>
<ul>
  <li>Next-generation firewalls for container traffic</li>
  <li>SIEM systems for log analysis</li>
  <li>Service mesh (Istio) for mTLS, encryption, and access control</li>
</ul>

<h2 id="security-checklist">Security Checklist</h2>

<h3 id="secure-the-build-pipeline">Secure the Build Pipeline</h3>
<ul>
  <li>Verify the image source (registry)</li>
  <li>Use official base images</li>
  <li>Lock down access to the image registry</li>
  <li>Scan container image layers for CVEs</li>
  <li>Scan configuration files for security in CI</li>
  <li>Static analysis of code and dependencies</li>
  <li>Tag and prevent vulnerable images from running</li>
</ul>

<h3 id="secure-the-host">Secure the Host</h3>
<ul>
  <li>Lock down the OS (e.g., Container Optimized OS)</li>
  <li>Use seccomp to restrict syscall access</li>
  <li>Use SELinux for container isolation</li>
  <li>Utilize container sandboxing (gVisor, Kata Containers)</li>
</ul>

<h3 id="secure-container-runtimes">Secure Container Runtimes</h3>
<ul>
  <li>Ensure security configs span all runtimes</li>
  <li>Use pod security policies to restrict privileged containers</li>
  <li>Restrict access to runtime daemon/APIs</li>
</ul>

<h3 id="secure-the-network">Secure the Network</h3>
<ul>
  <li>Firewall for internet-exposed services</li>
  <li>Layer 3/4 network policies</li>
  <li>Layer 7 policies via service mesh</li>
  <li>mTLS for workload authentication</li>
  <li>Segregate workloads with host/network isolation</li>
  <li>Log unsuccessful connection attempts</li>
</ul>

<h3 id="secure-the-orchestrator">Secure the Orchestrator</h3>
<ul>
  <li>Version control for service definitions (git)</li>
  <li>RBAC for orchestrator API access</li>
  <li>Audit third-party plugins (CNIs, CSIs, CRIs)</li>
  <li>Enable API access audit logs</li>
  <li>Scan Kubernetes manifests in CI</li>
  <li>Encrypt secrets and rotate encryption keys</li>
</ul>

<h3 id="secure-the-data">Secure the Data</h3>
<ul>
  <li>Filesystem encryption for container storage</li>
  <li>Minimal write/execute access</li>
  <li>Scan images for embedded secrets before pushing</li>
  <li>Limit storage-related syscalls</li>
  <li>Log all access attempts to sensitive data</li>
</ul>

<h2 id="container-security-tools">Container Security Tools</h2>

<h3 id="monitoring">Monitoring</h3>

<table>
  <thead>
    <tr>
      <th>Tool</th>
      <th>Description</th>
    </tr>
  </thead>
  <tbody>
    <tr>
      <td><a href="https://www.dynatrace.com/">Dynatrace</a></td>
      <td>APM Solution</td>
    </tr>
    <tr>
      <td><a href="https://www.datadoghq.com/">Datadog</a></td>
      <td>Cloud monitoring for Docker</td>
    </tr>
    <tr>
      <td><a href="https://prometheus.io/">Prometheus</a></td>
      <td>Monitoring &amp; alerting toolkit</td>
    </tr>
    <tr>
      <td><a href="https://grafana.com/">Grafana</a></td>
      <td>Analytics &amp; monitoring platform</td>
    </tr>
    <tr>
      <td><a href="https://www.elastic.co/">Elasticsearch</a></td>
      <td>Search &amp; analytics engine</td>
    </tr>
    <tr>
      <td><a href="https://github.com/google/cadvisor">cAdvisor</a></td>
      <td>Lightweight container metrics</td>
    </tr>
  </tbody>
</table>

<h3 id="scanning">Scanning</h3>

<table>
  <thead>
    <tr>
      <th>Tool</th>
      <th>Description</th>
    </tr>
  </thead>
  <tbody>
    <tr>
      <td><a href="https://github.com/goharbor/harbor">Harbor</a></td>
      <td>Trusted cloud native registry</td>
    </tr>
    <tr>
      <td><a href="https://github.com/anchore/anchore-engine">Anchore</a></td>
      <td>Container image analysis</td>
    </tr>
    <tr>
      <td><a href="https://github.com/quay/clair">Clair</a></td>
      <td>Vulnerability scanner</td>
    </tr>
    <tr>
      <td><a href="https://github.com/aquasecurity/trivy">Trivy</a></td>
      <td>Comprehensive vulnerability scanner</td>
    </tr>
    <tr>
      <td><a href="https://github.com/falcosecurity/falco">Falco</a></td>
      <td>Runtime threat detection</td>
    </tr>
    <tr>
      <td><a href="https://github.com/docker/docker-bench-security">Docker Bench</a></td>
      <td>CIS Docker benchmark</td>
    </tr>
    <tr>
      <td><a href="https://github.com/anchore/grype">Grype</a></td>
      <td>Image vulnerability scanner</td>
    </tr>
    <tr>
      <td><a href="https://github.com/sigstore/cosign">Cosign</a></td>
      <td>Container signing</td>
    </tr>
    <tr>
      <td><a href="https://github.com/containrrr/watchtower">Watchtower</a></td>
      <td>Auto-update running containers</td>
    </tr>
  </tbody>
</table>

<h2 id="dockerfile--container-testing">Dockerfile &amp; Container Testing</h2>

<p><strong>Dockerfile Testing</strong> (before deployment):</p>
<ul>
  <li>Linting with Hadolint, Dockle</li>
  <li>Static analysis with Snyk, Anchore</li>
</ul>

<p><strong>Container Testing</strong> (after deployment):</p>
<ul>
  <li>Unit testing of individual components</li>
  <li>Integration testing between containers</li>
  <li>End-to-end testing for real-world scenarios</li>
  <li>Security testing with Clair, Trivy</li>
</ul>]]></content><author><name>Akın Demir</name></author><category term="devsecops" /><category term="container-security" /><category term="docker" /><category term="kubernetes" /><category term="container-security" /><category term="devsecops" /><category term="trivy" /><category term="falco" /><summary type="html"><![CDATA[Comprehensive guide to container security - from threat landscape and security standards to hardening checklists, scanning tools, and networking best practices.]]></summary></entry><entry><title type="html">Building a DevSecOps Pipeline with Jenkins &amp;amp; SonarQube</title><link href="https://akindemirsec.github.io/blog/2024/03/26/devsecops-pipeline-jenkins/" rel="alternate" type="text/html" title="Building a DevSecOps Pipeline with Jenkins &amp;amp; SonarQube" /><published>2024-03-26T00:00:00+00:00</published><updated>2024-03-26T00:00:00+00:00</updated><id>https://akindemirsec.github.io/blog/2024/03/26/devsecops-pipeline-jenkins</id><content type="html" xml:base="https://akindemirsec.github.io/blog/2024/03/26/devsecops-pipeline-jenkins/"><![CDATA[<p>In this project we will integrate SonarQube in Jenkins and automate security testing with a CI/CD pipeline.</p>

<p><strong>Technologies:</strong></p>
<ul>
  <li>Jenkins (Local installation)</li>
  <li>SonarQube (Dockerized)</li>
</ul>

<p>We will use a vulnerable web application named <a href="https://github.com/ScaleSec/vulnado">Vulnado</a> for testing.</p>

<h2 id="jenkins-installation">Jenkins Installation</h2>

<p>There are different ways to install Jenkins but I chose the easiest way. You can install Jenkins with package managers like apt/snap or follow the <a href="https://www.jenkins.io/doc/book/installing/linux/">official installation guide</a>. Also you can run Jenkins on Docker but this is not preferred.</p>

<p><img src="/assets/images/blog/Pasted%20image%2020240326153707.png" alt="Jenkins install" /></p>

<h2 id="docker-installation">Docker Installation</h2>

<p>We are installing Docker to run SonarQube on Docker:</p>

<p><img src="/assets/images/blog/Pasted%20image%2020240326153728.png" alt="Docker install" /></p>

<h2 id="configuring-jenkins">Configuring Jenkins</h2>

<p>
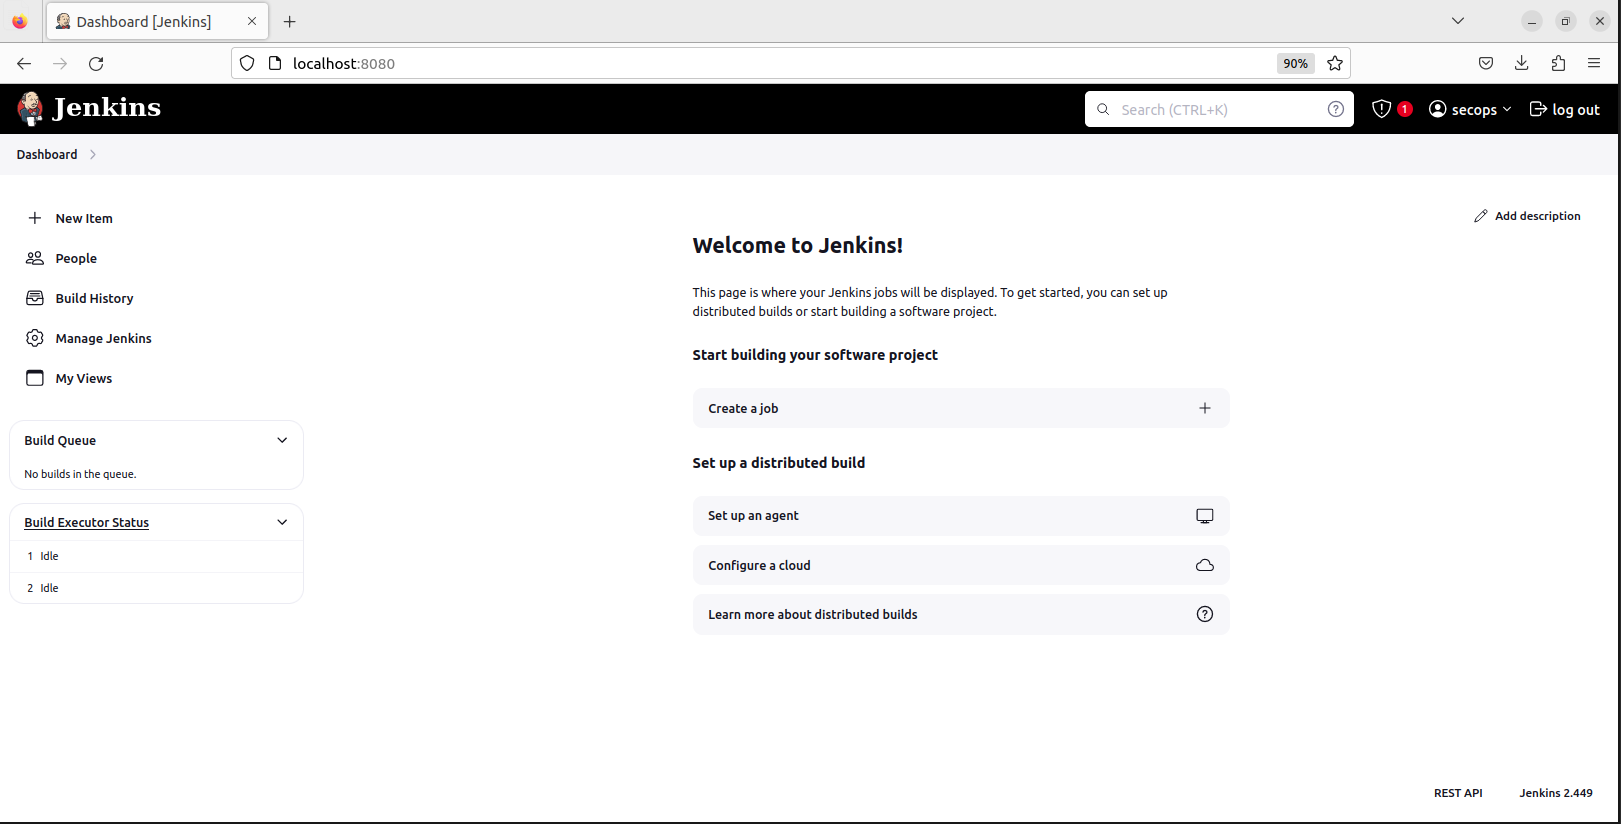
After installation you can reach Jenkins’s web interface from browser at <code class="language-plaintext highlighter-rouge">localhost:8080</code> (default):</p>

<p><img src="/assets/images/blog/Pasted%20image%2020240326153755.png" alt="Jenkins web interface" /></p>

<p>
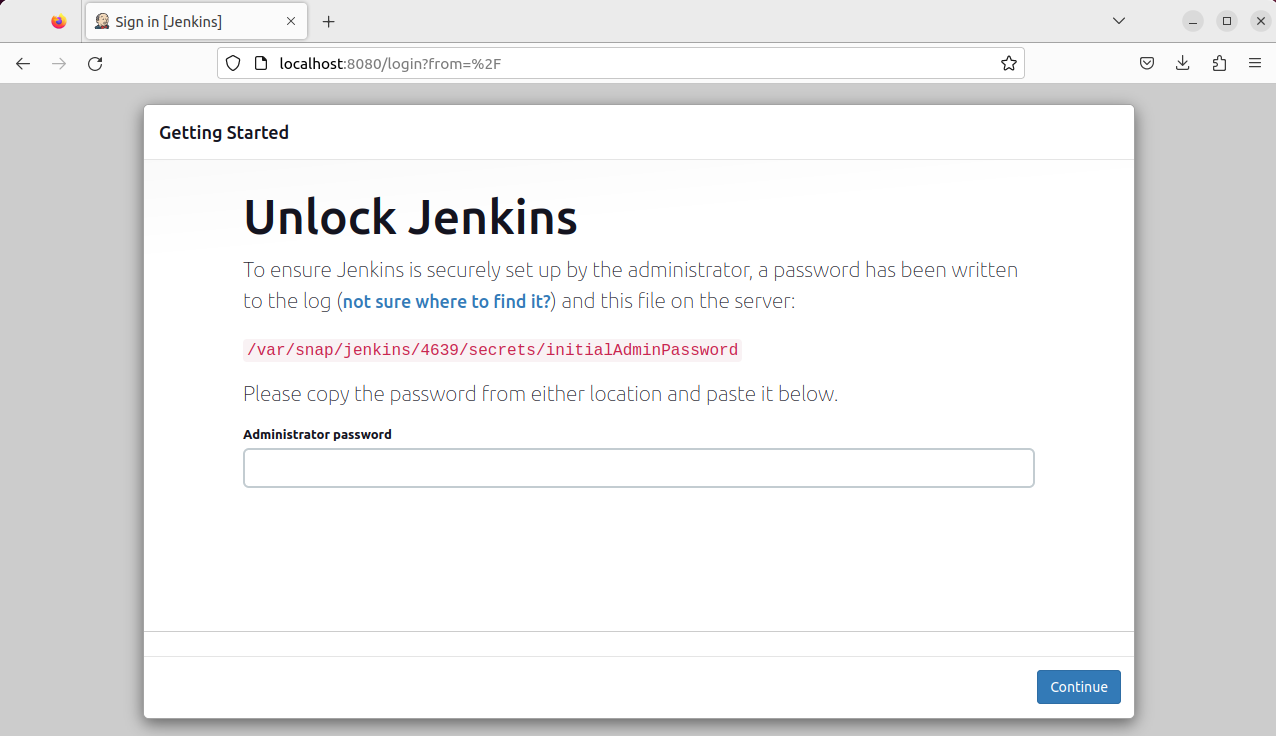
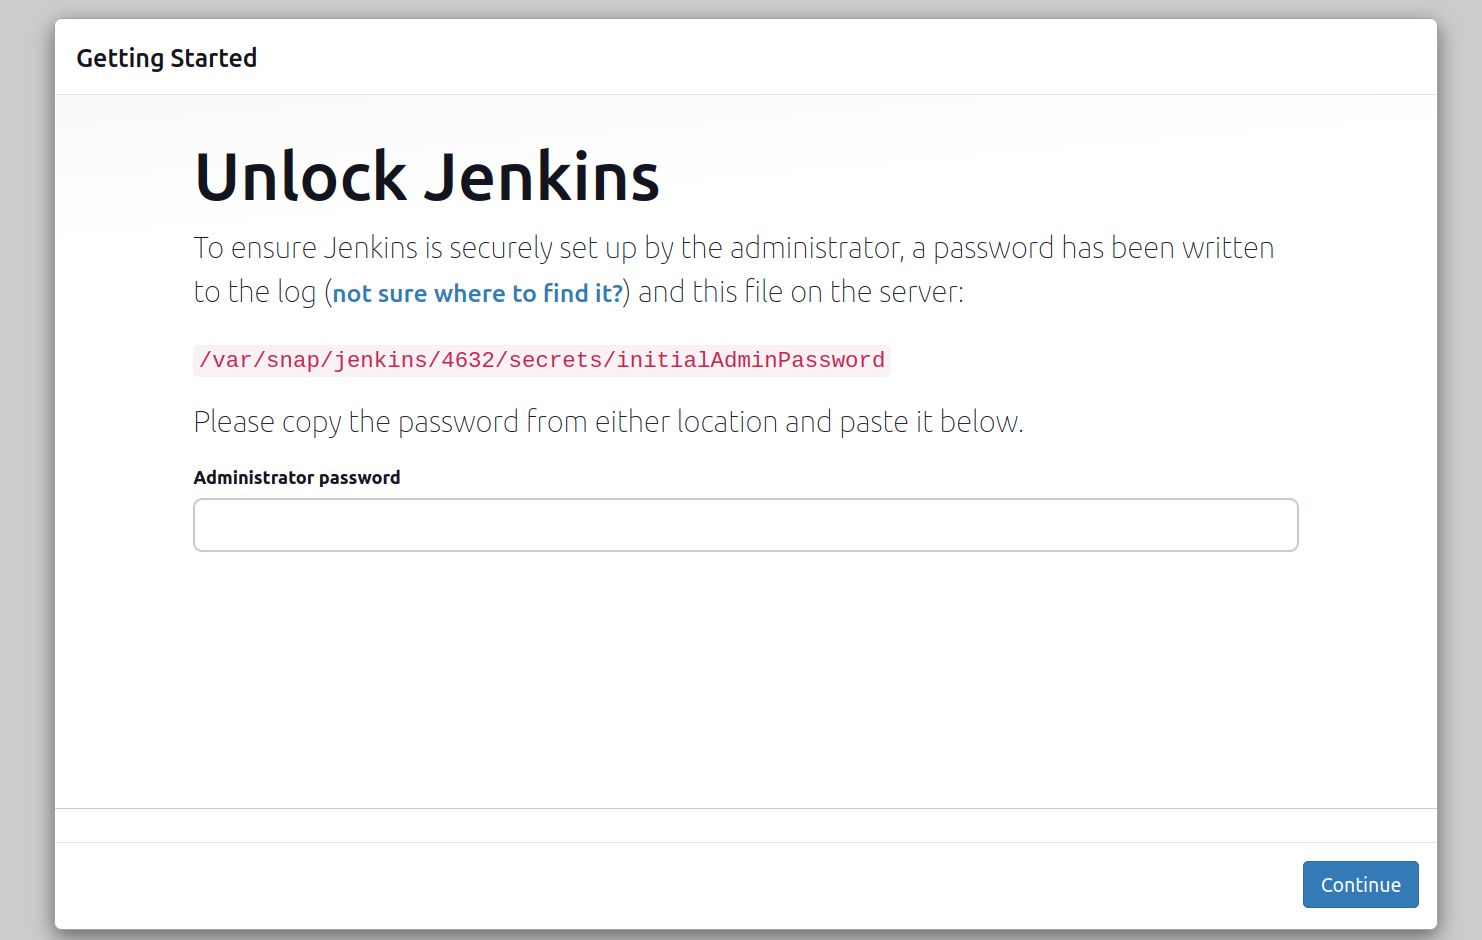
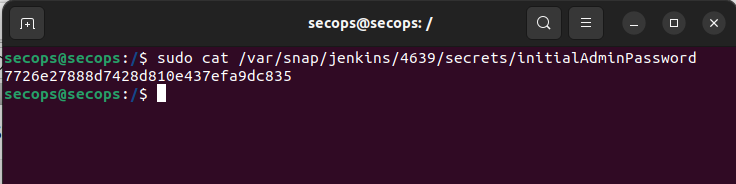
Getting the initial admin password:</p>

<p><img src="/assets/images/blog/Pasted%20image%2020240326153811.png" alt="Jenkins password" /></p>

<p>
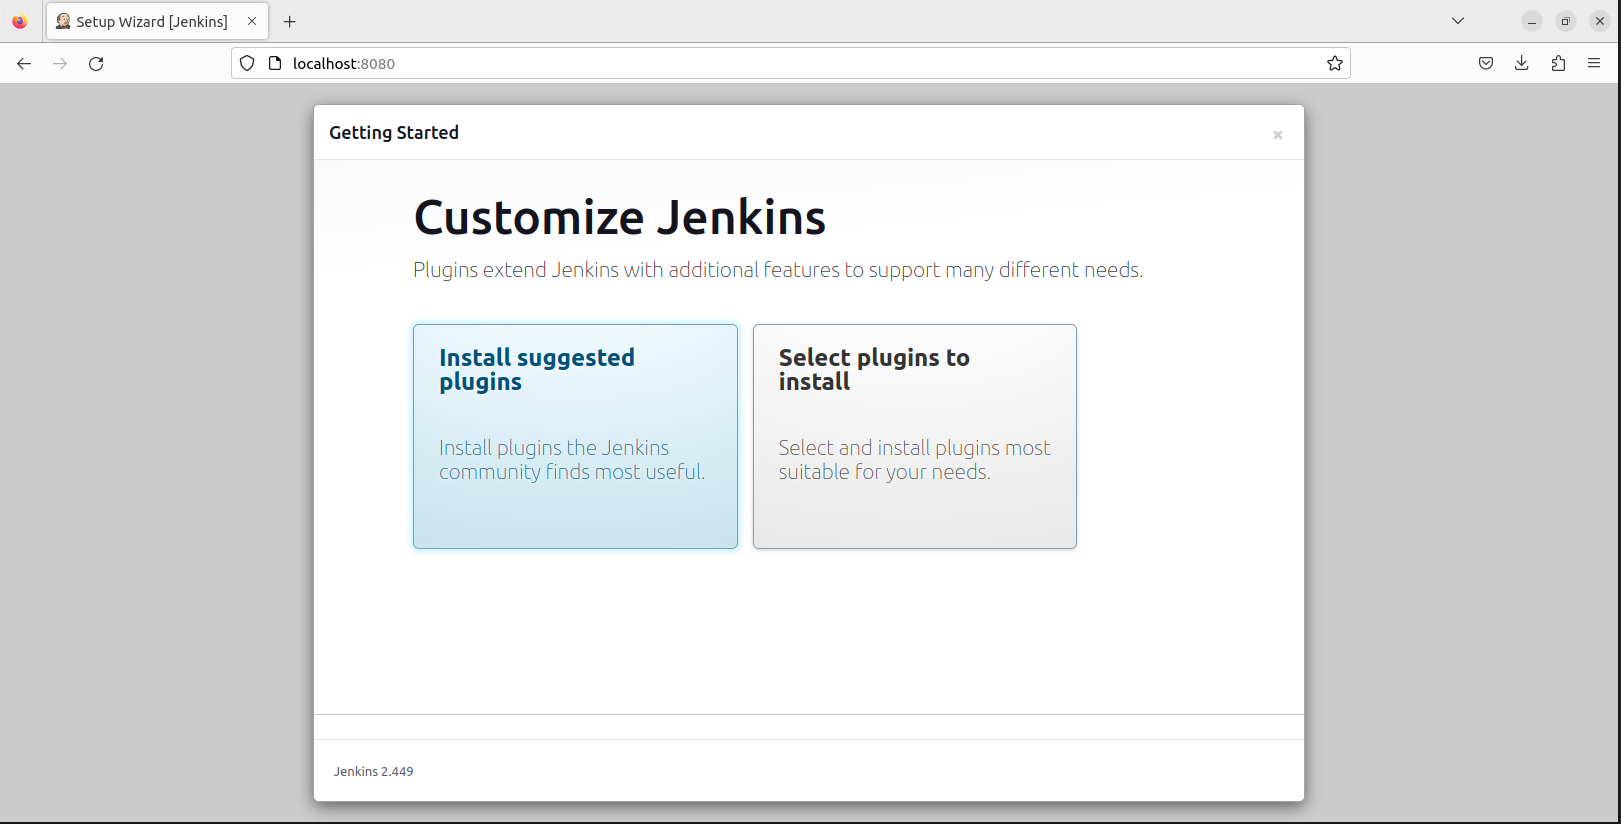
After you logged in, Jenkins asks which plugins to install. I chose suggested plugins:</p>

<p><img src="/assets/images/blog/Pasted%20image%2020240326153828.png" alt="Plugin installation" /></p>

<p>
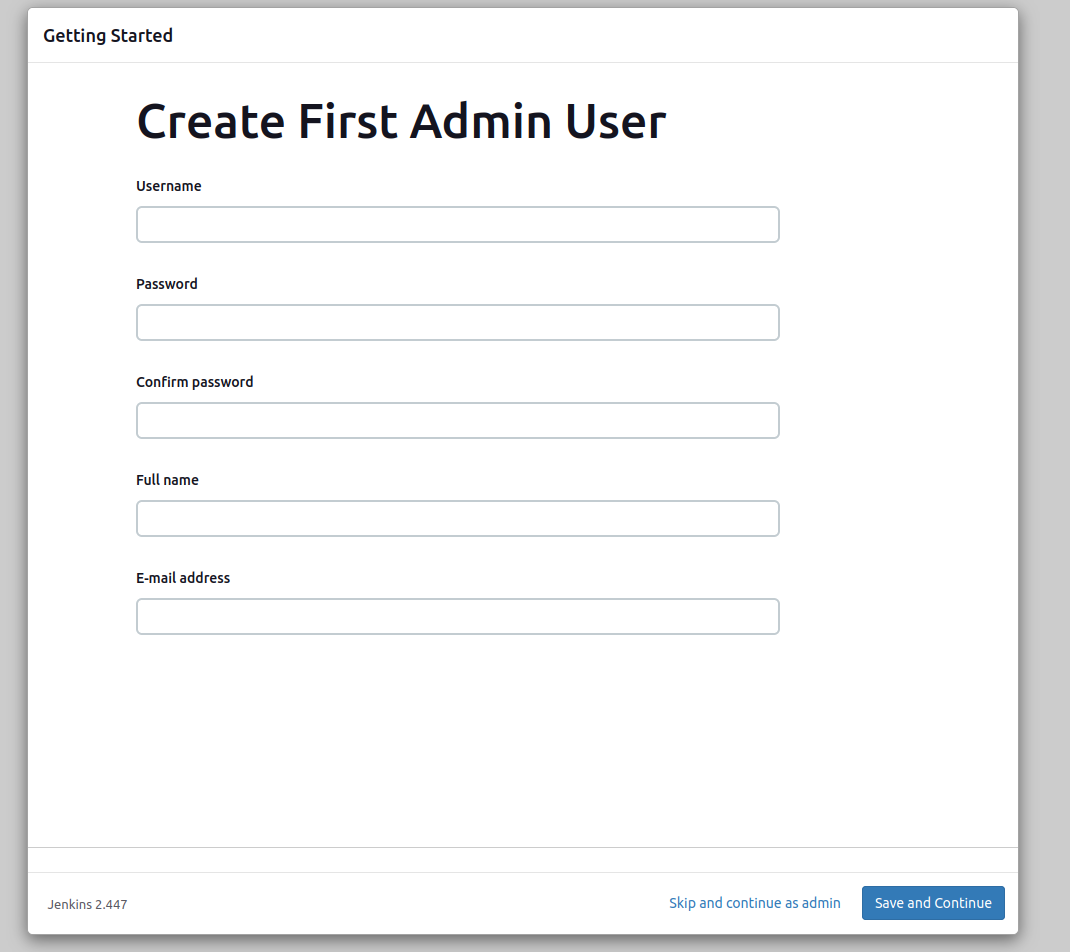
Create the first admin user:</p>

<p><img src="/assets/images/blog/Pasted%20image%2020240326153843.png" alt="Admin user creation" /></p>

<p>
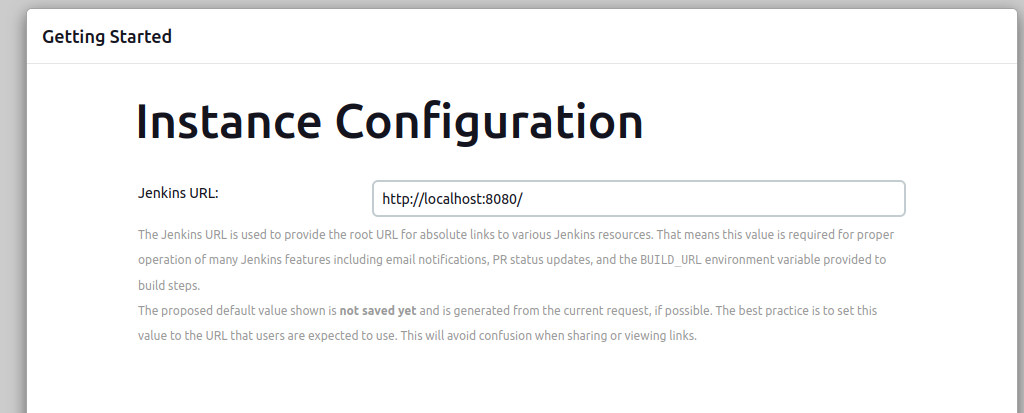
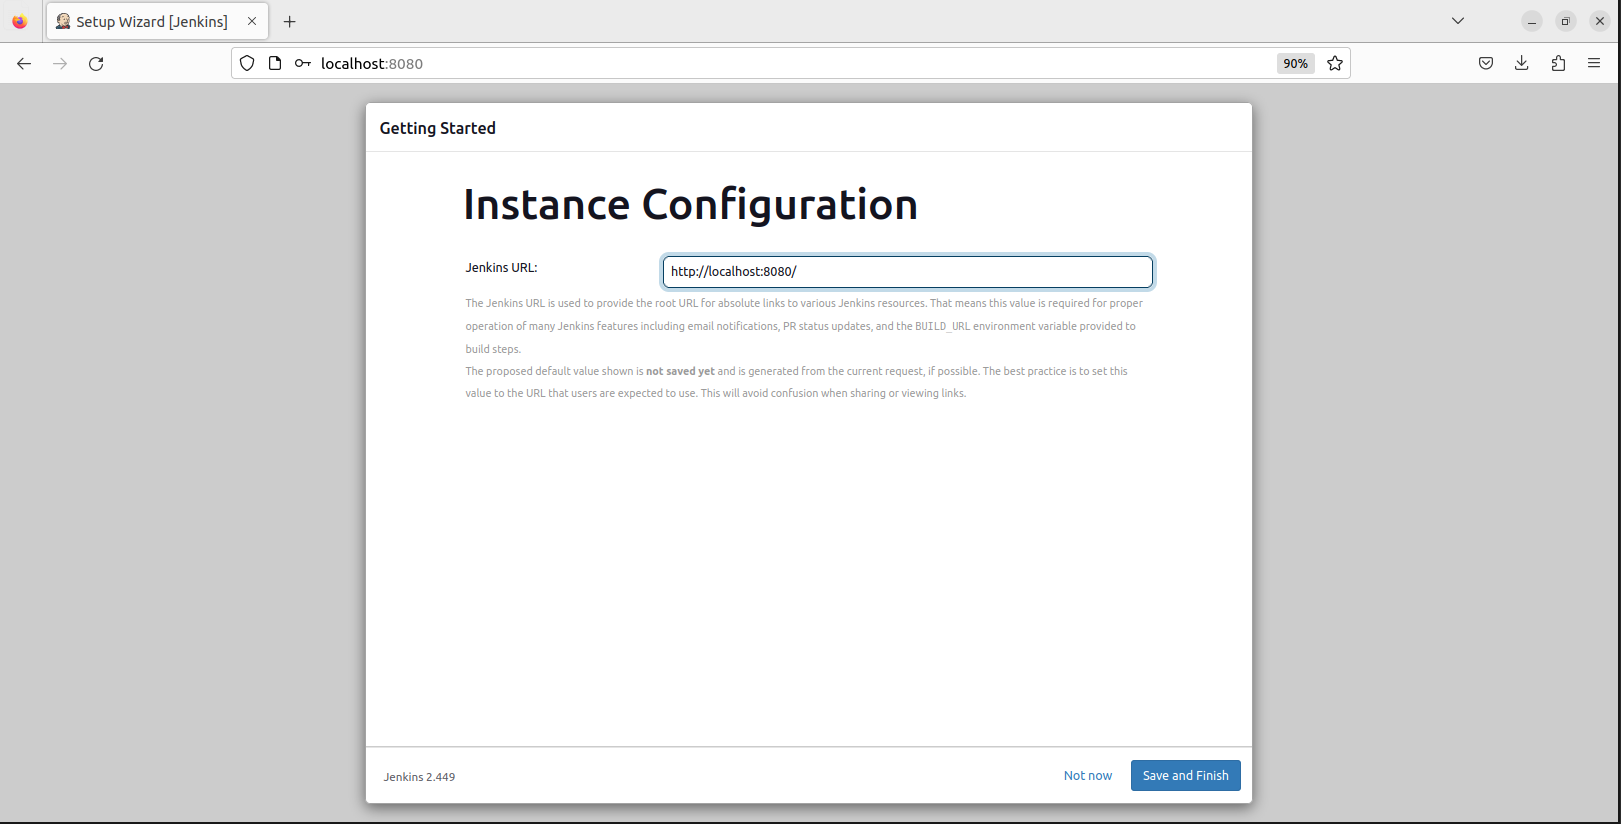
Configure the Jenkins URL:</p>

<p><img src="/assets/images/blog/Pasted%20image%2020240326153902.png" alt="URL config" /></p>

<p>
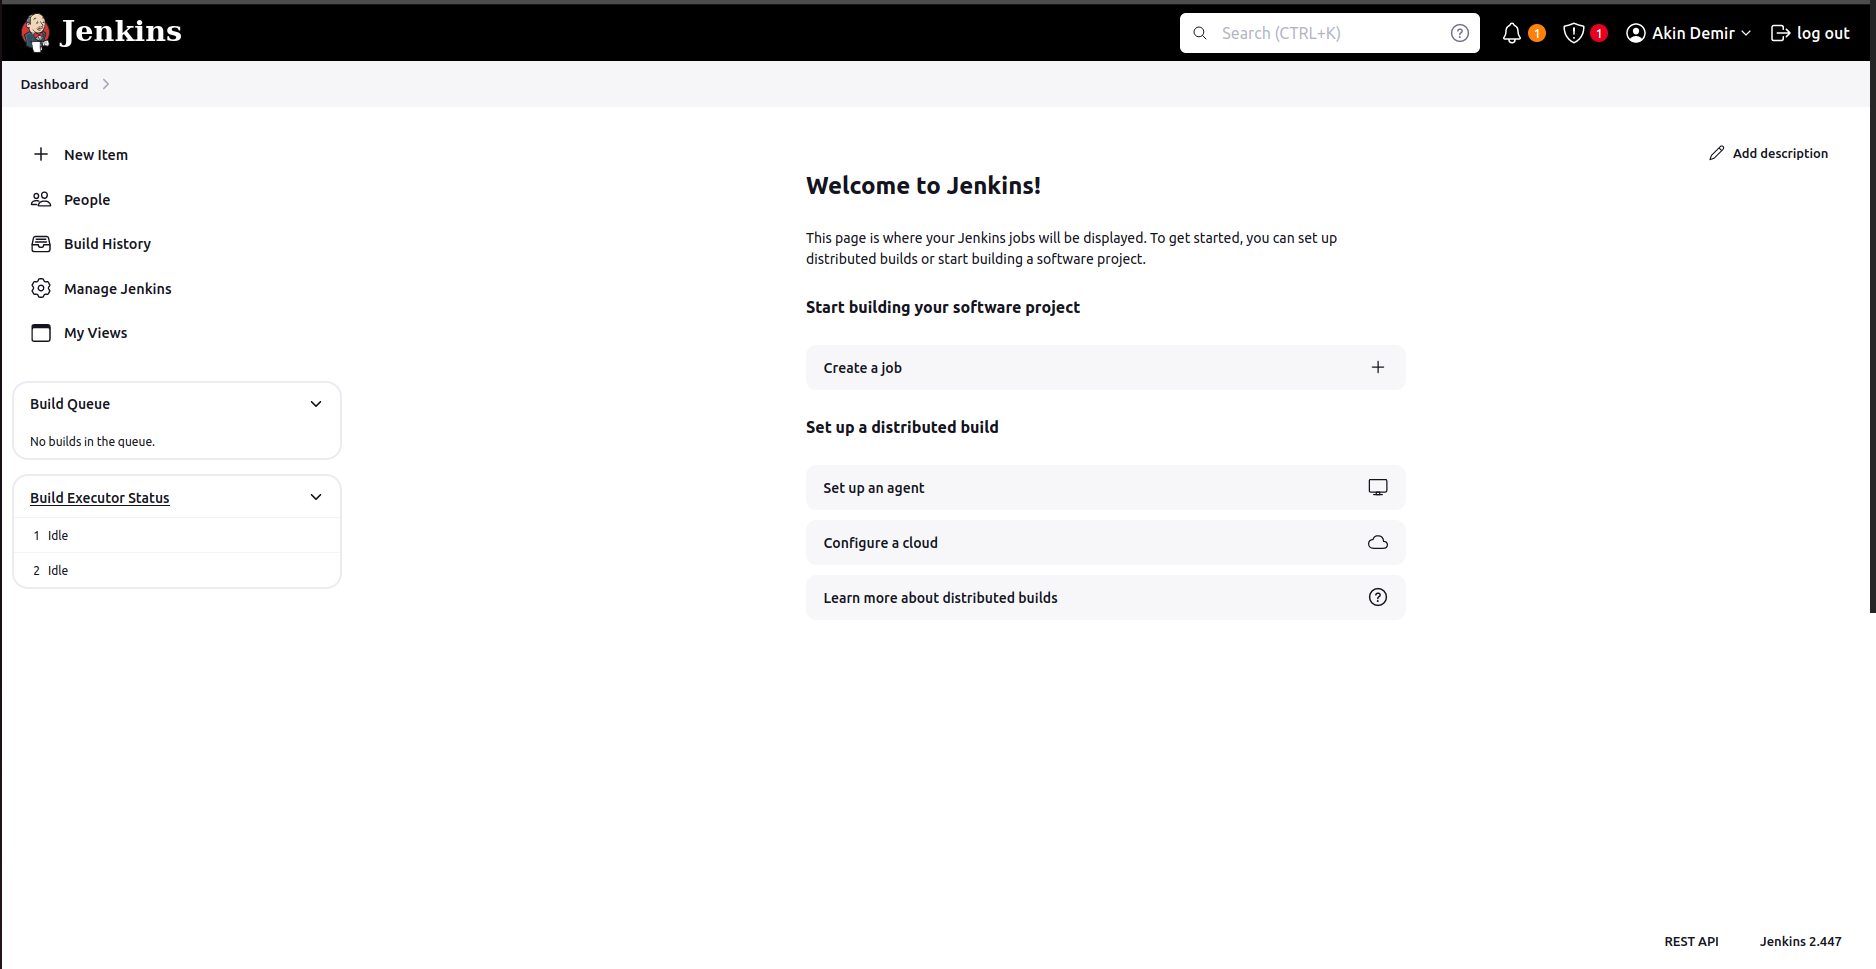
And here’s the Jenkins main page:</p>

<p><img src="/assets/images/blog/Pasted%20image%2020240326153914.png" alt="Jenkins main page" /></p>

<h2 id="creating-the-pipeline">Creating the Pipeline</h2>

<p>
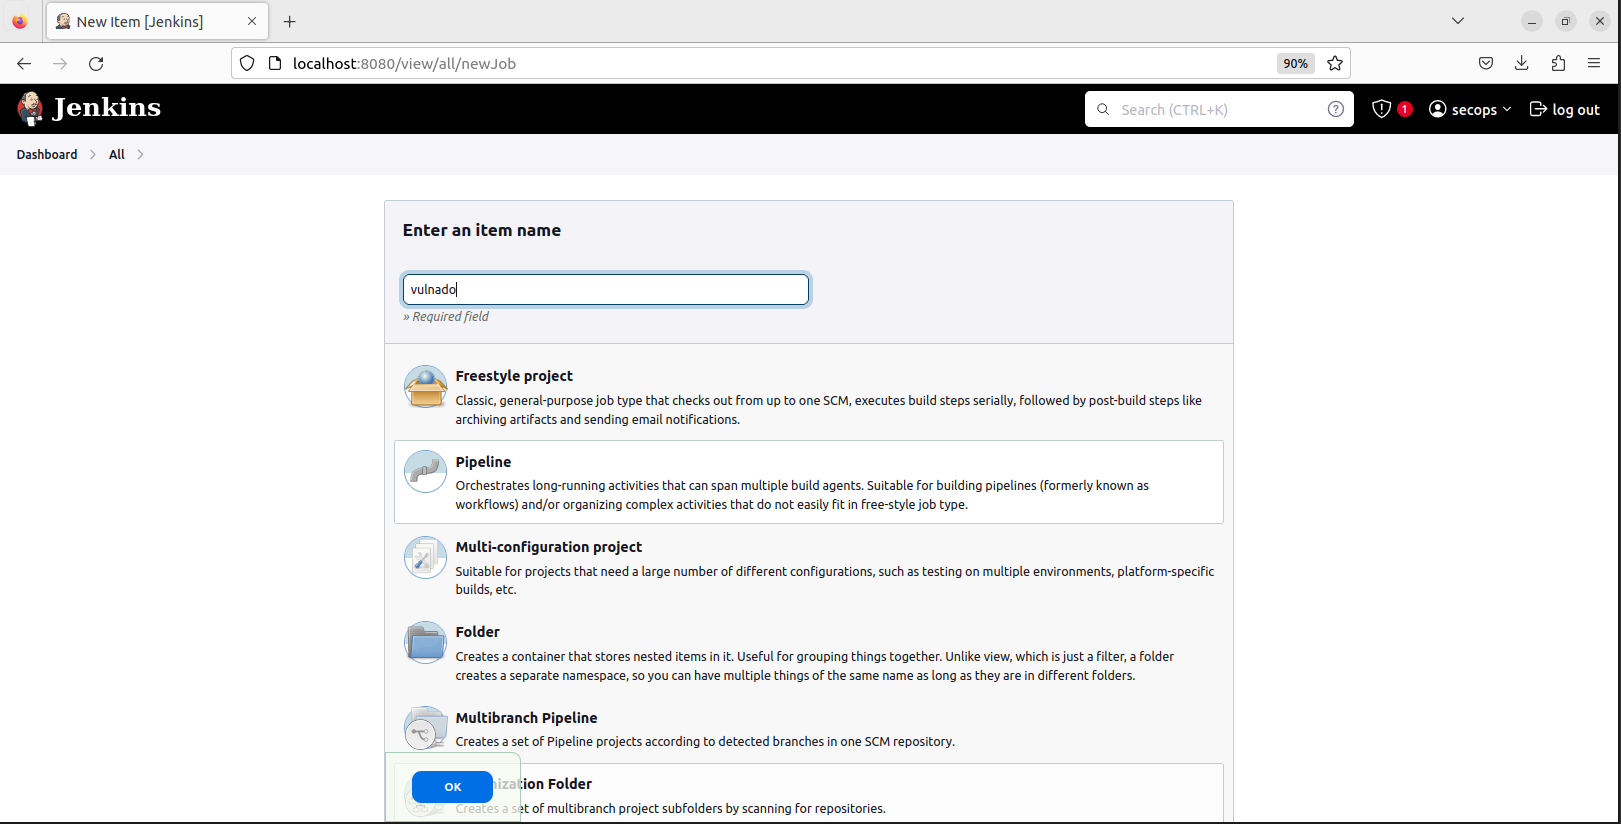
Press “New Item”, select Pipeline and give it a name:</p>

<p><img src="/assets/images/blog/Pasted%20image%2020240326153936.png" alt="New pipeline" /></p>

<p>In the opened page scroll down to the Pipeline section. This is the editor we are going to use:</p>

<p><img src="/assets/images/blog/Pasted%20image%2020240326153952.png" alt="Pipeline editor" /></p>

<p>
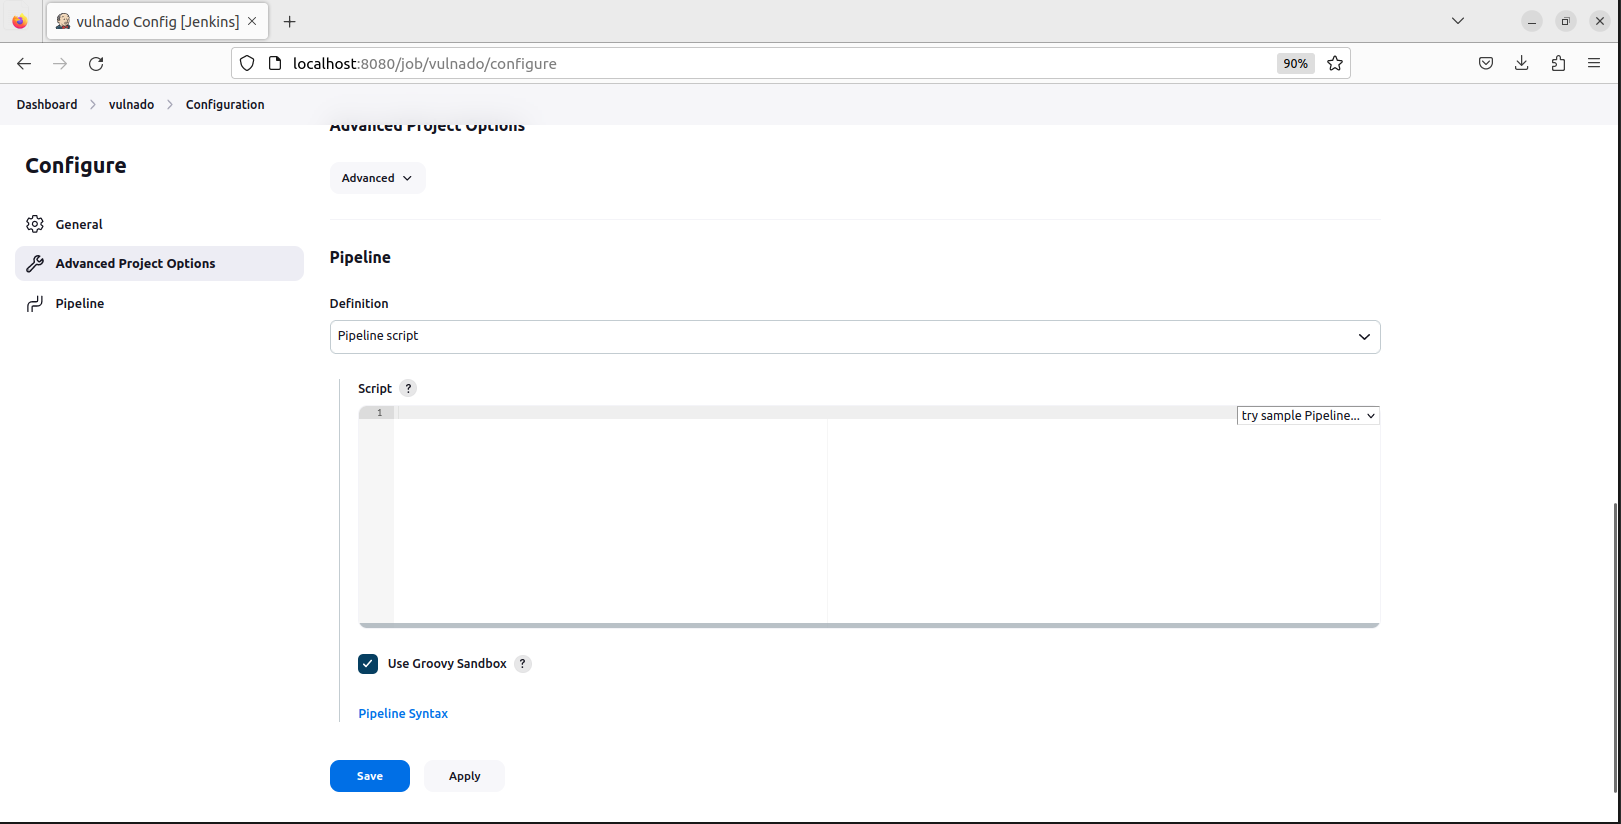
Jenkins has a syntax for pipeline scripting. It’s easy to understand and use.</p>

<h3 id="stage-1-install-the-project">
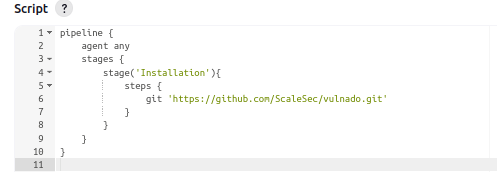
Stage 1: Install the Project</h3>

<p>The first part of our pipeline - installing the project from Git:</p>

<p><img src="/assets/images/blog/Pasted%20image%2020240326154104.png" alt="Install stage" /></p>

<h3 id="stage-2-build-the-project">Stage 2: Build the Project</h3>

<p>Second part - building the project (before build: <code class="language-plaintext highlighter-rouge">sudo apt-get install maven -y</code>):</p>

<p><img src="/assets/images/blog/Pasted%20image%2020240326154112.png" alt="Build stage" /></p>

<p>
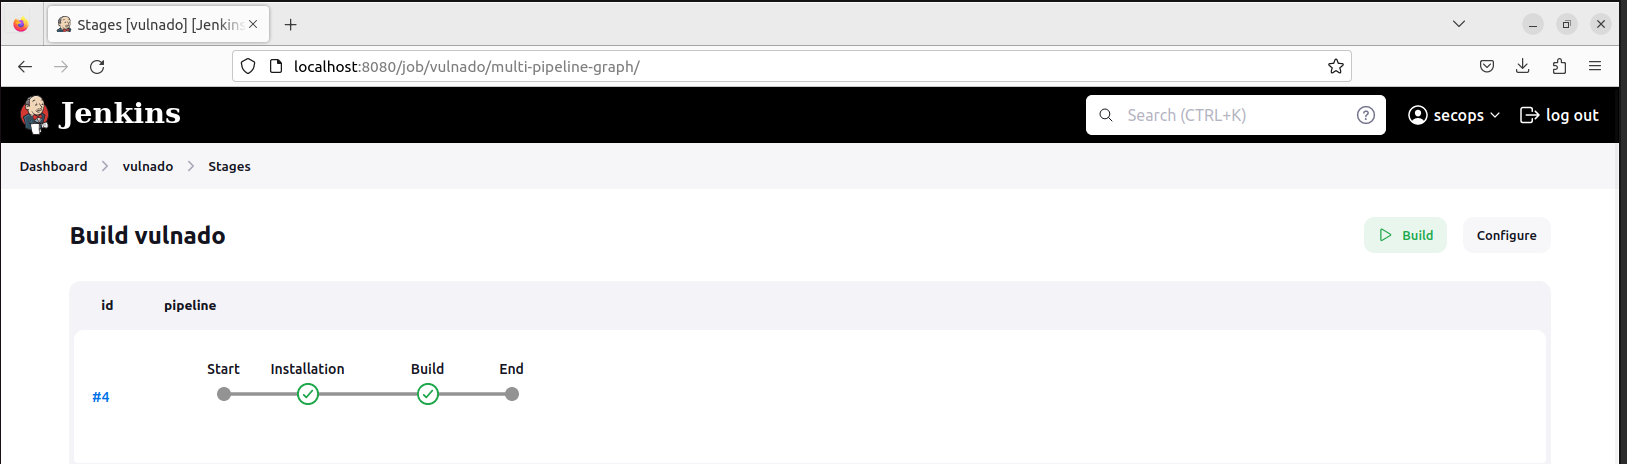
After building, your pipeline should look like this:</p>

<p><img src="/assets/images/blog/Pasted%20image%2020240326154137.png" alt="Pipeline after build" /></p>

<h2 id="setting-up-sonarqube">Setting Up SonarQube</h2>

<p>We have installed and built the project in Jenkins. Now let’s start security testing!</p>

<p>Pull the SonarQube image:</p>

<p><img src="/assets/images/blog/Pasted%20image%2020240326154214.png" alt="Docker pull sonarqube" /></p>

<p>Run SonarQube in a container:</p>

<p><img src="/assets/images/blog/Pasted%20image%2020240326154219.png" alt="Docker run" /></p>

<p>Check if it’s working:
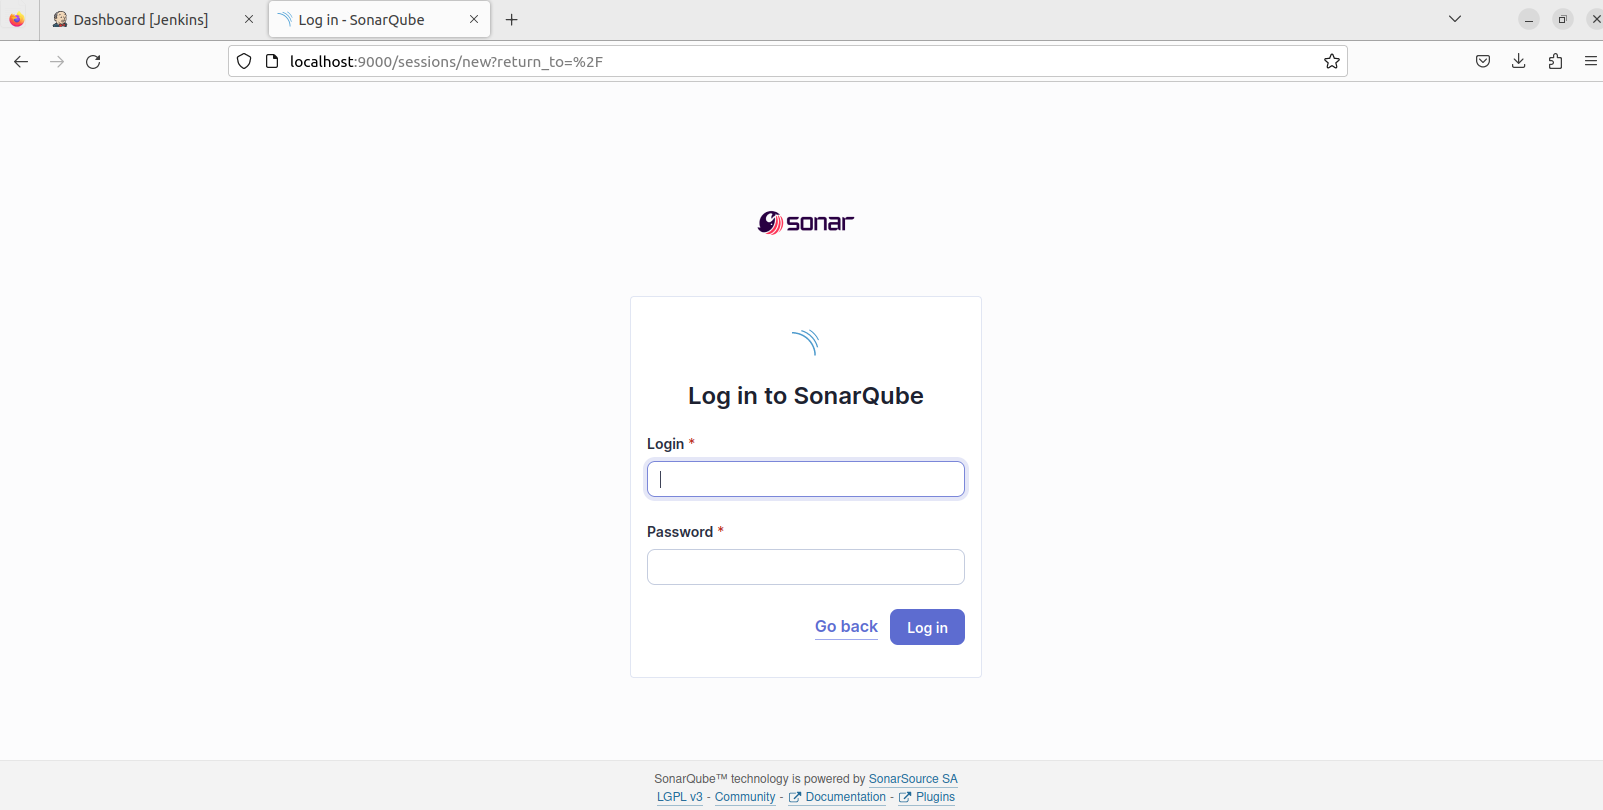
</p>

<p><img src="/assets/images/blog/Pasted%20image%2020240326154243.png" alt="Container running" /></p>

<p>Access SonarQube at <code class="language-plaintext highlighter-rouge">localhost:9000</code> with default credentials <code class="language-plaintext highlighter-rouge">admin:admin</code>:</p>

<p><img src="/assets/images/blog/Pasted%20image%2020240326154259.png" alt="SonarQube login" /></p>

<p>
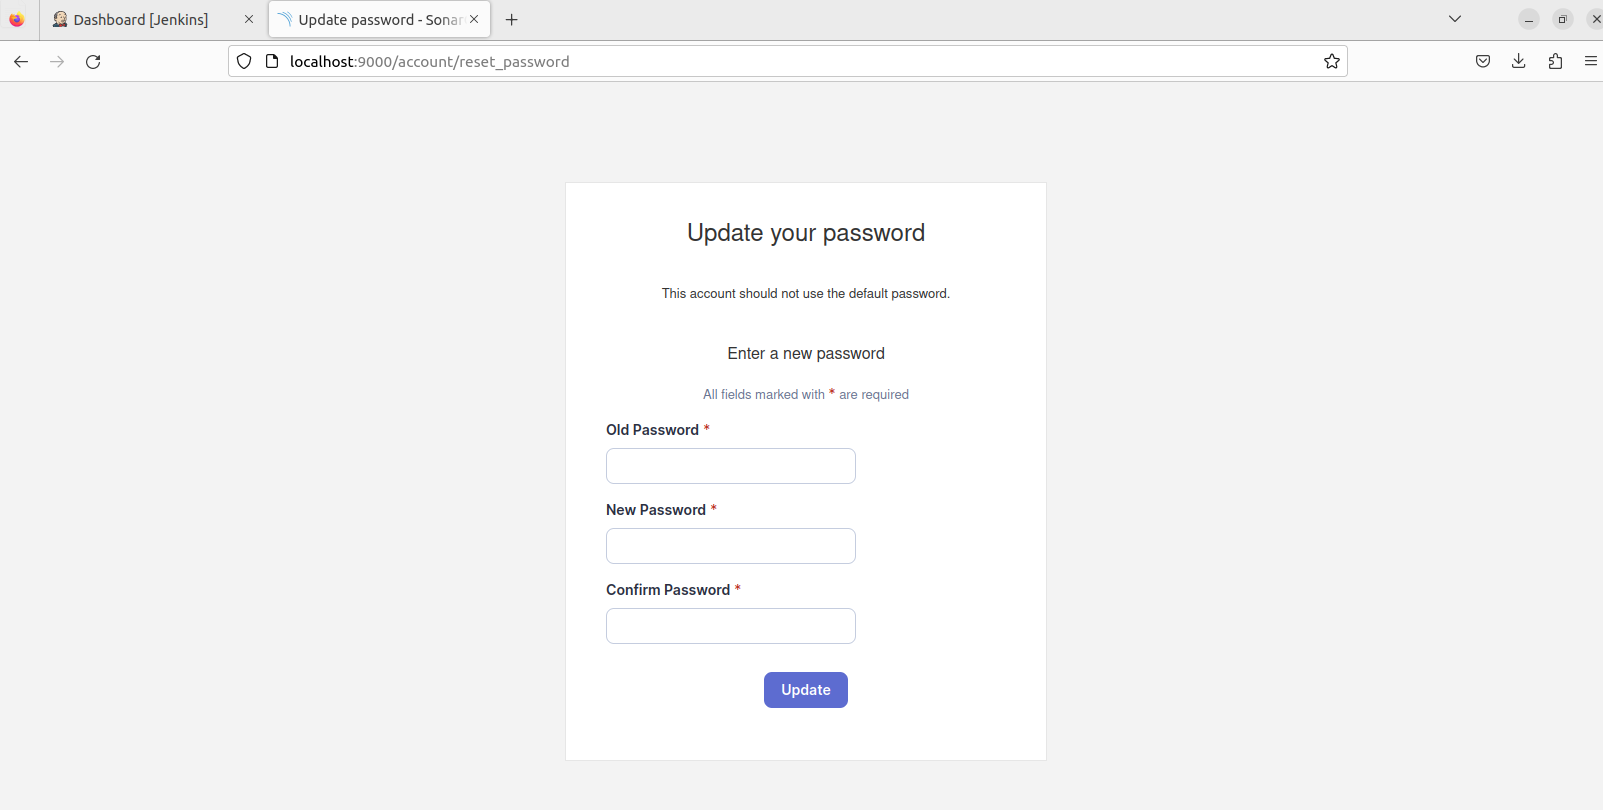
Reset your password:</p>

<p><img src="/assets/images/blog/Pasted%20image%2020240326154310.png" alt="Reset password" /></p>

<h2 id="sonarqube-project-setup">
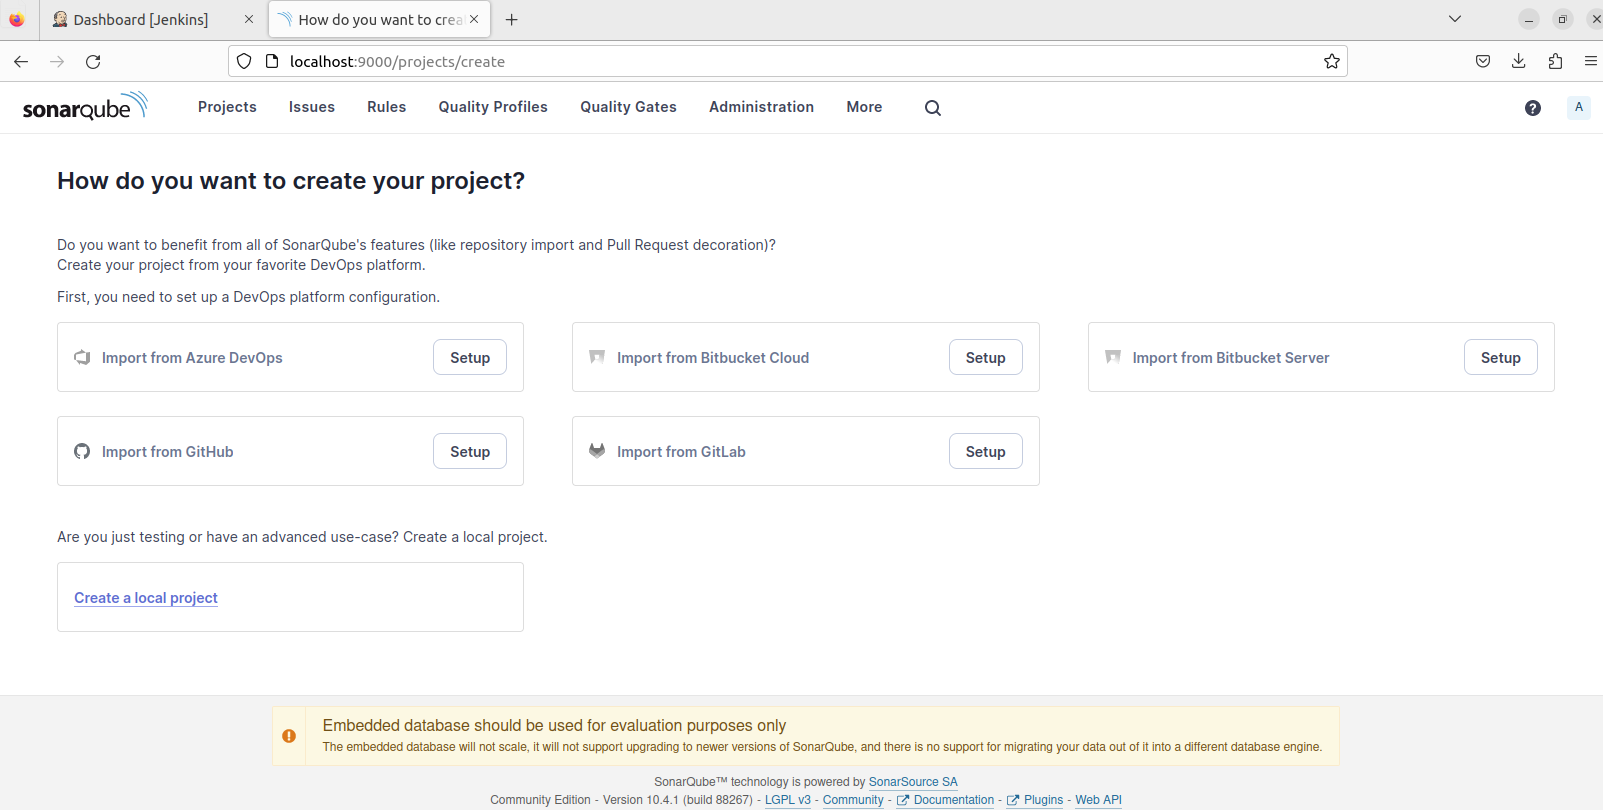
SonarQube Project Setup</h2>

<p>
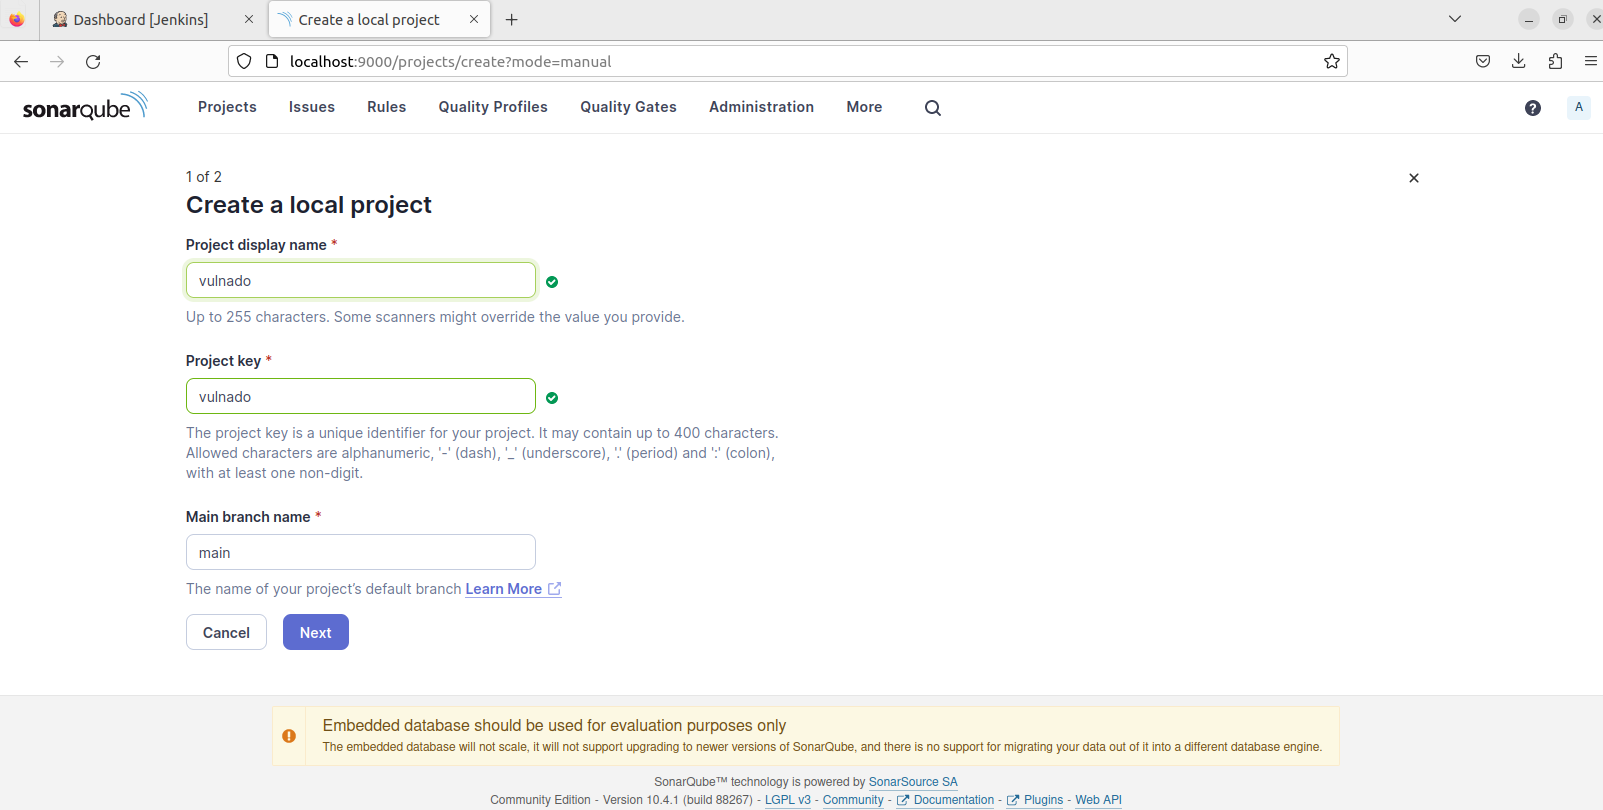
Choose “Create a local project”:</p>

<p><img src="/assets/images/blog/Pasted%20image%2020240326154325.png" alt="Create project" /></p>

<p>Fill the name and key:</p>

<p><img src="/assets/images/blog/Pasted%20image%2020240326154329.png" alt="Project details" /></p>

<p>Choose “Use global settings”:</p>

<p><img src="/assets/images/blog/Pasted%20image%2020240326154407.png" alt="Global settings" /></p>

<p>
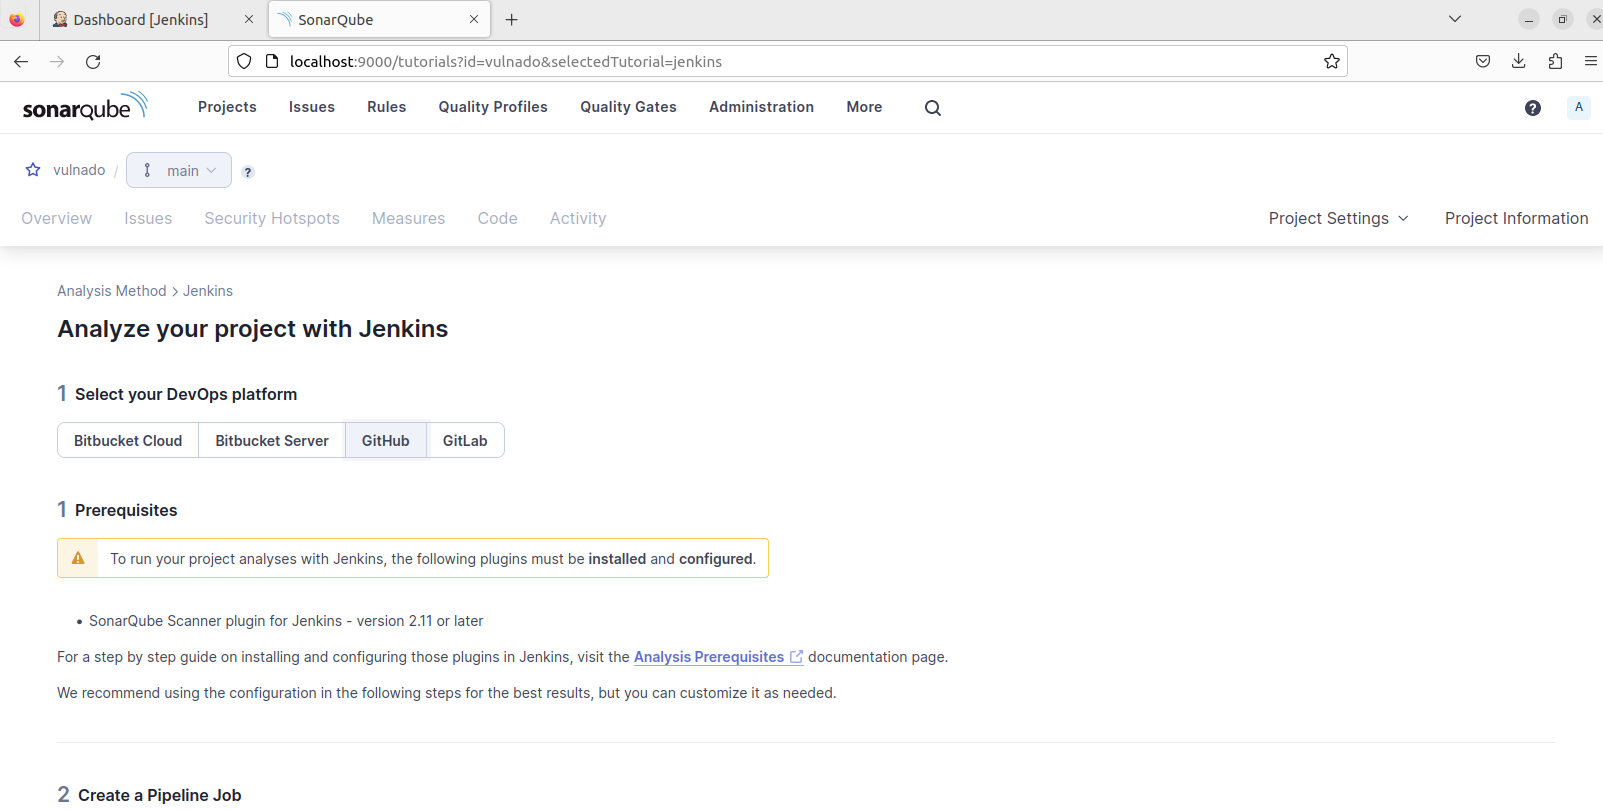
Choose Jenkins as analysis method:</p>

<p><img src="/assets/images/blog/Pasted%20image%2020240326154423.png" alt="Jenkins analysis" /></p>

<p>Choose GitHub:</p>

<p><img src="/assets/images/blog/Pasted%20image%2020240326154431.png" alt="GitHub integration" /></p>

<p>
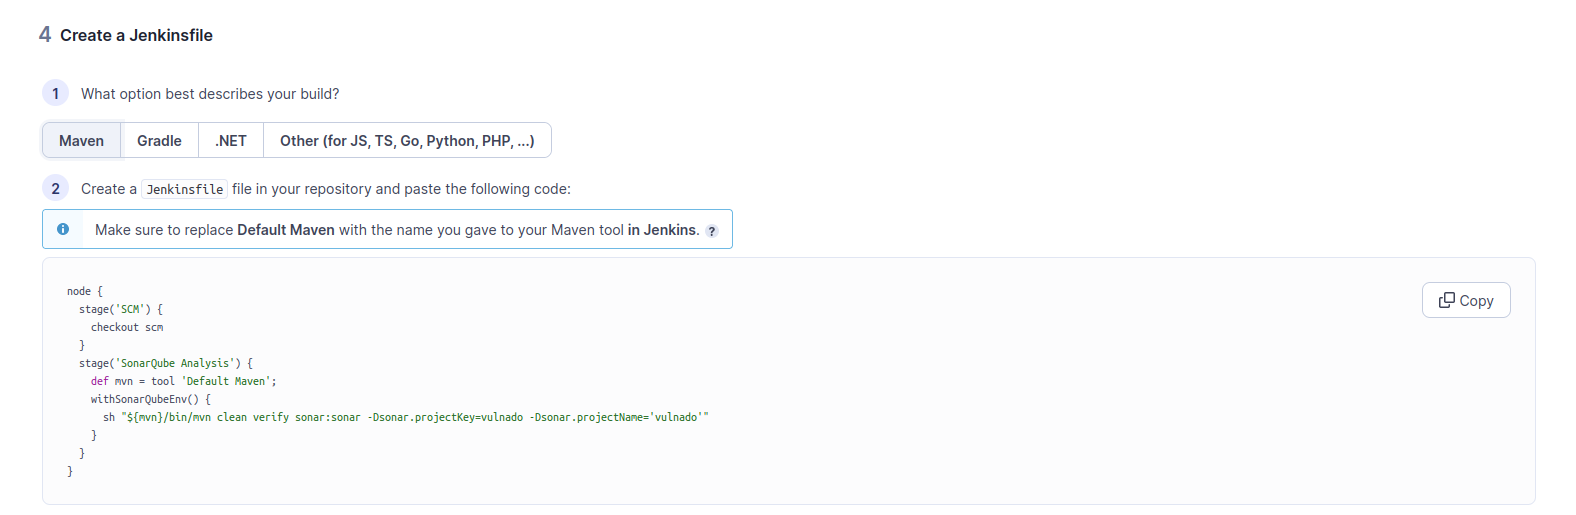
Choose Maven - SonarQube gives us a Jenkinsfile but this script needs modification:</p>

<p><img src="/assets/images/blog/Pasted%20image%2020240326154438.png" alt="Maven config" /></p>

<h2 id="integrating-sonarqube-with-jenkins">Integrating SonarQube with Jenkins</h2>

<p>In SonarQube, go to My Account &gt; Security &gt; Generate new token (Global Analysis Token):</p>

<p><img src="/assets/images/blog/Pasted%20image%2020240326154517.png" alt="Generate token" /></p>

<p>In Jenkins Dashboard &gt; Manage Jenkins:</p>

<p><img src="/assets/images/blog/Pasted%20image%2020240326154536.png" alt="Manage Jenkins" /></p>

<p>
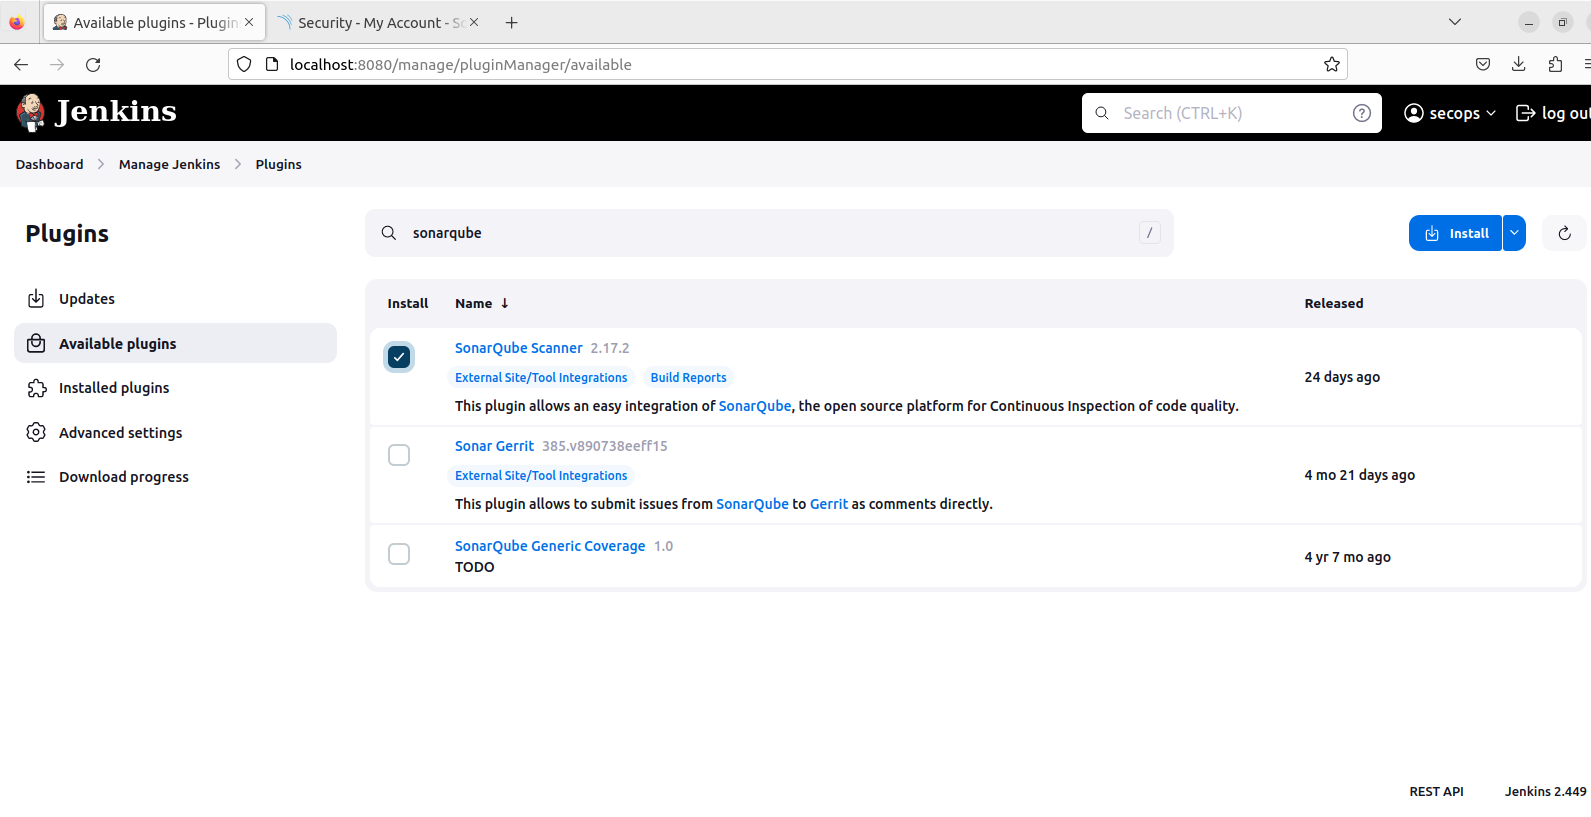
Install the SonarQube Scanner plugin:
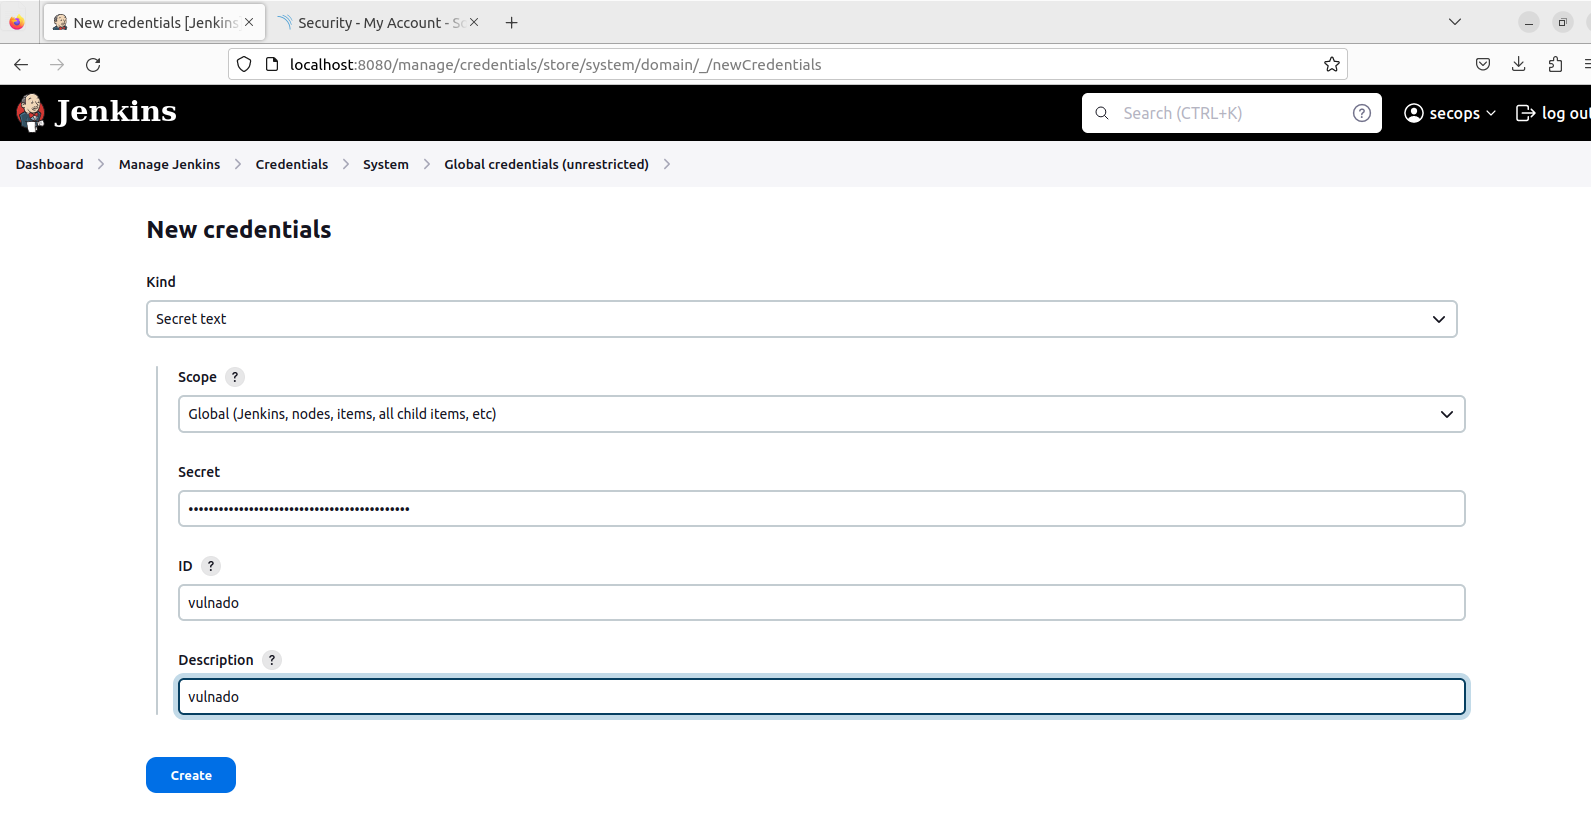
</p>

<p><img src="/assets/images/blog/Pasted%20image%2020240326154551.png" alt="SonarQube plugin" /></p>

<p>Go to Manage Jenkins &gt; Credentials &gt; Add credential:</p>

<p><img src="/assets/images/blog/Pasted%20image%2020240326154604.png" alt="Add credential" /></p>

<p>
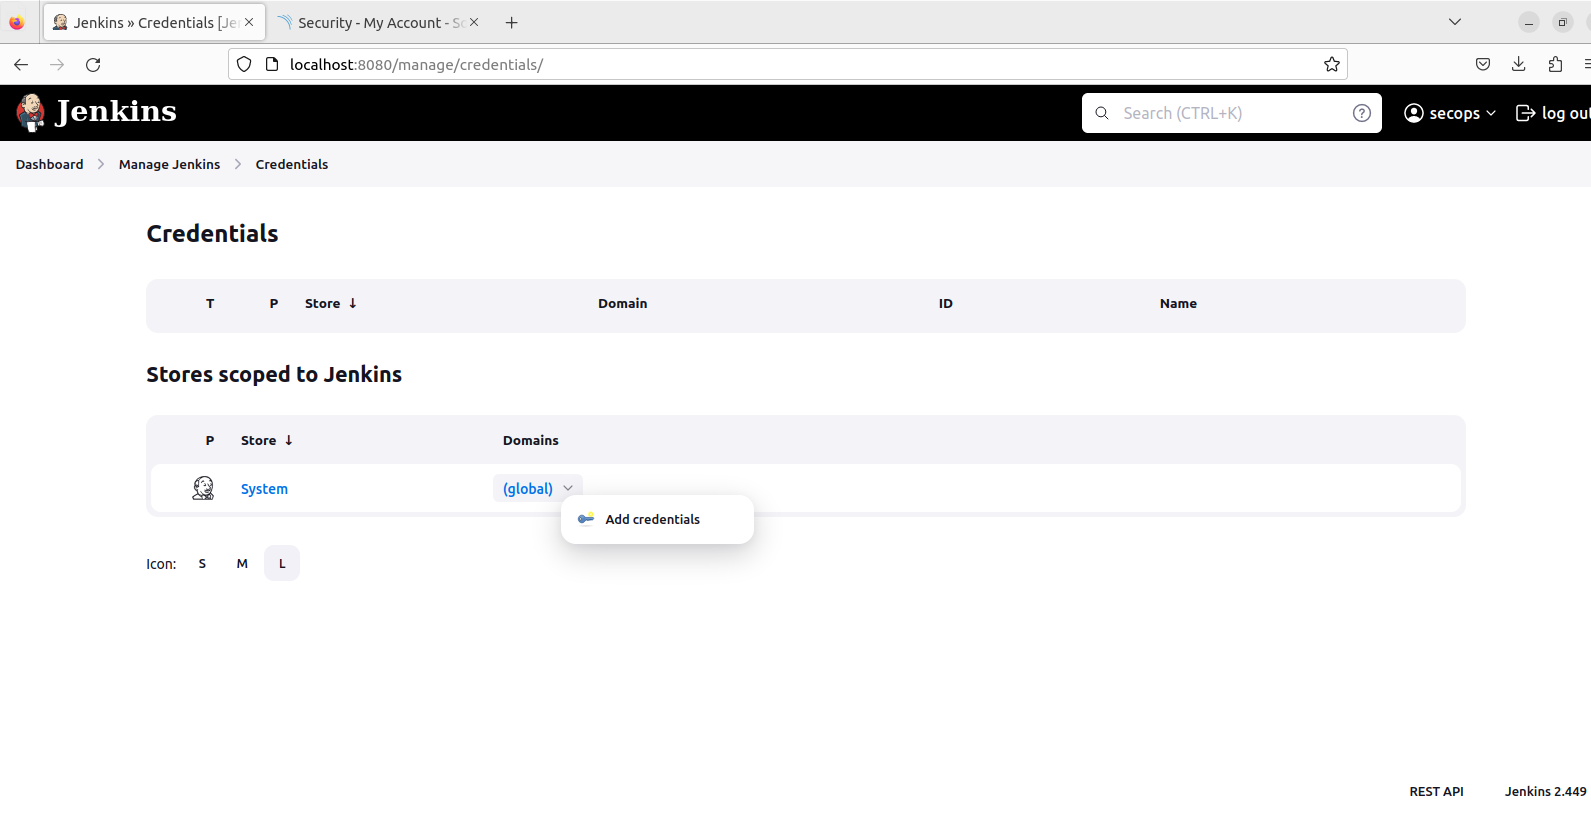
Select “Secret text” and paste the SonarQube Global Analysis Token:
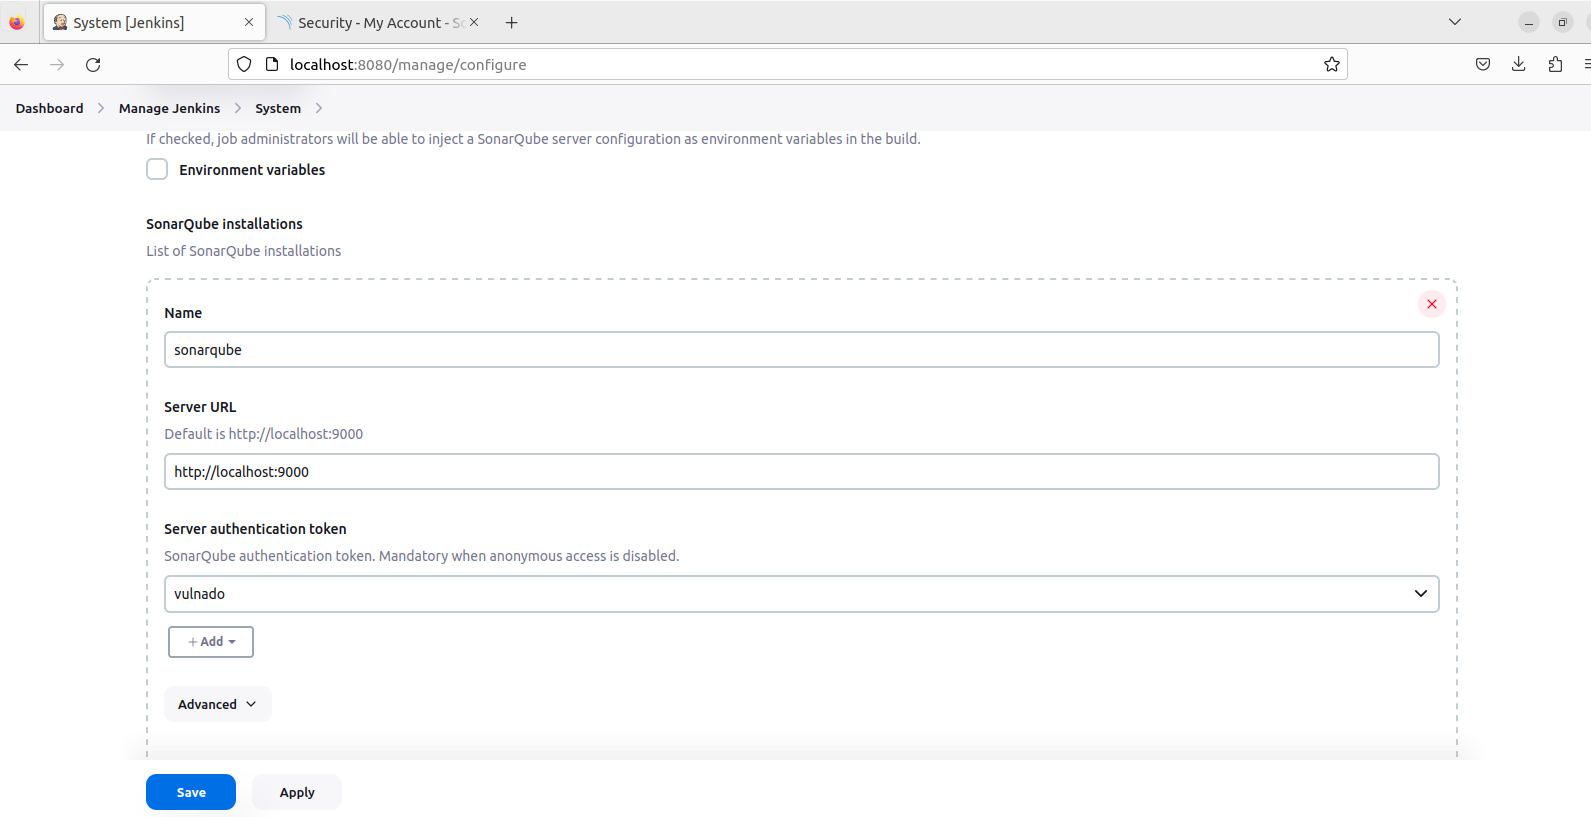
</p>

<p><img src="/assets/images/blog/Pasted%20image%2020240326154634.png" alt="Secret text" /></p>

<p>Manage Jenkins &gt; System &gt; SonarQube installations. Give a name, write the URL, and choose the token:
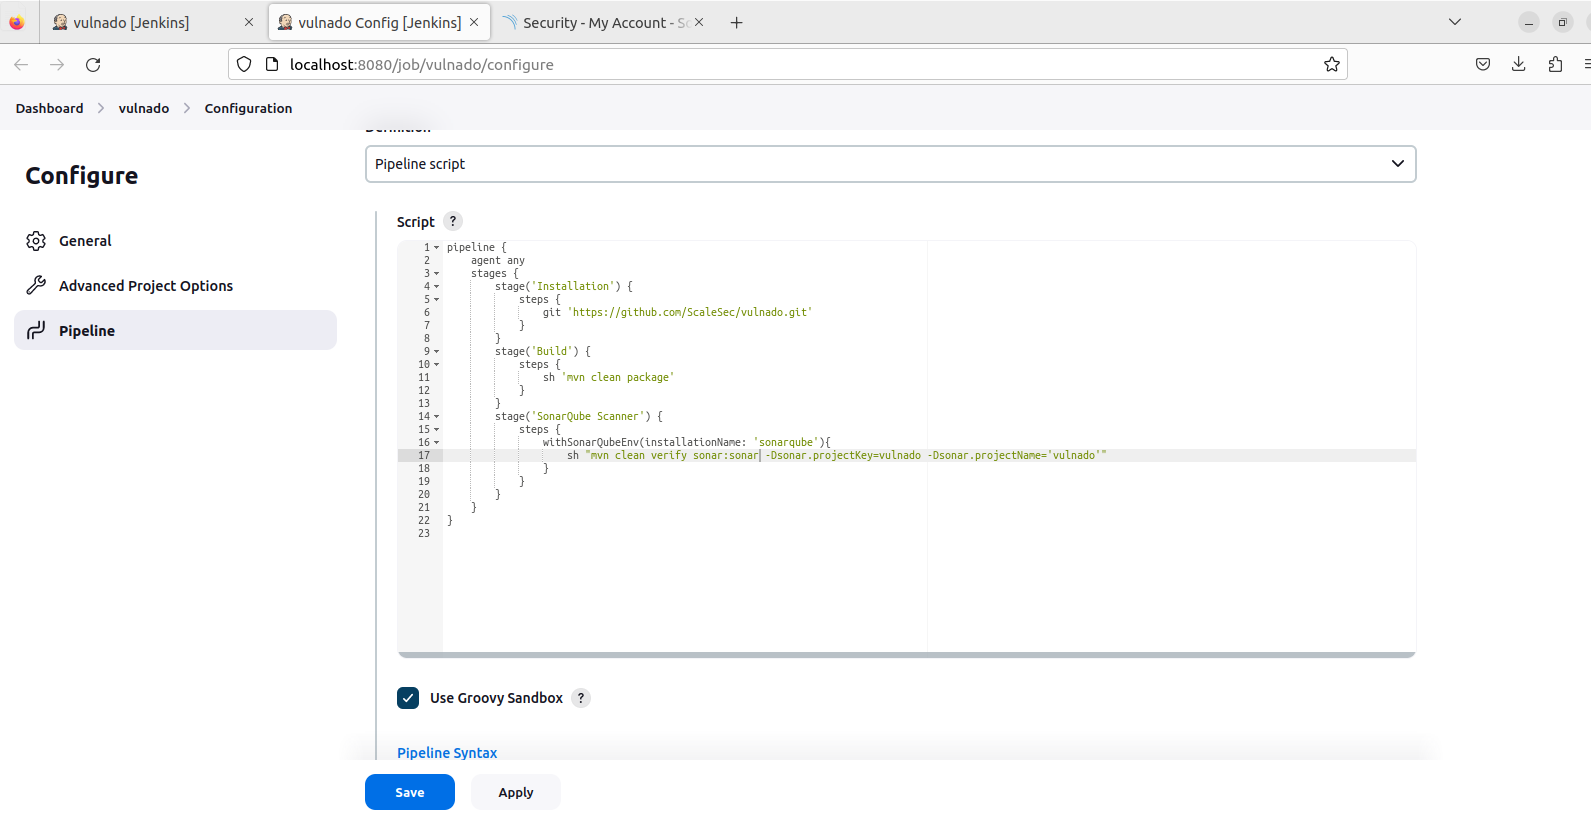
</p>

<p><img src="/assets/images/blog/Pasted%20image%2020240326154652.png" alt="SonarQube config" /></p>

<h2 id="final-pipeline">Final Pipeline</h2>

<p>Your pipeline should look like this:</p>

<p><img src="/assets/images/blog/Pasted%20image%2020240326154708.png" alt="Final pipeline" /></p>

<p>
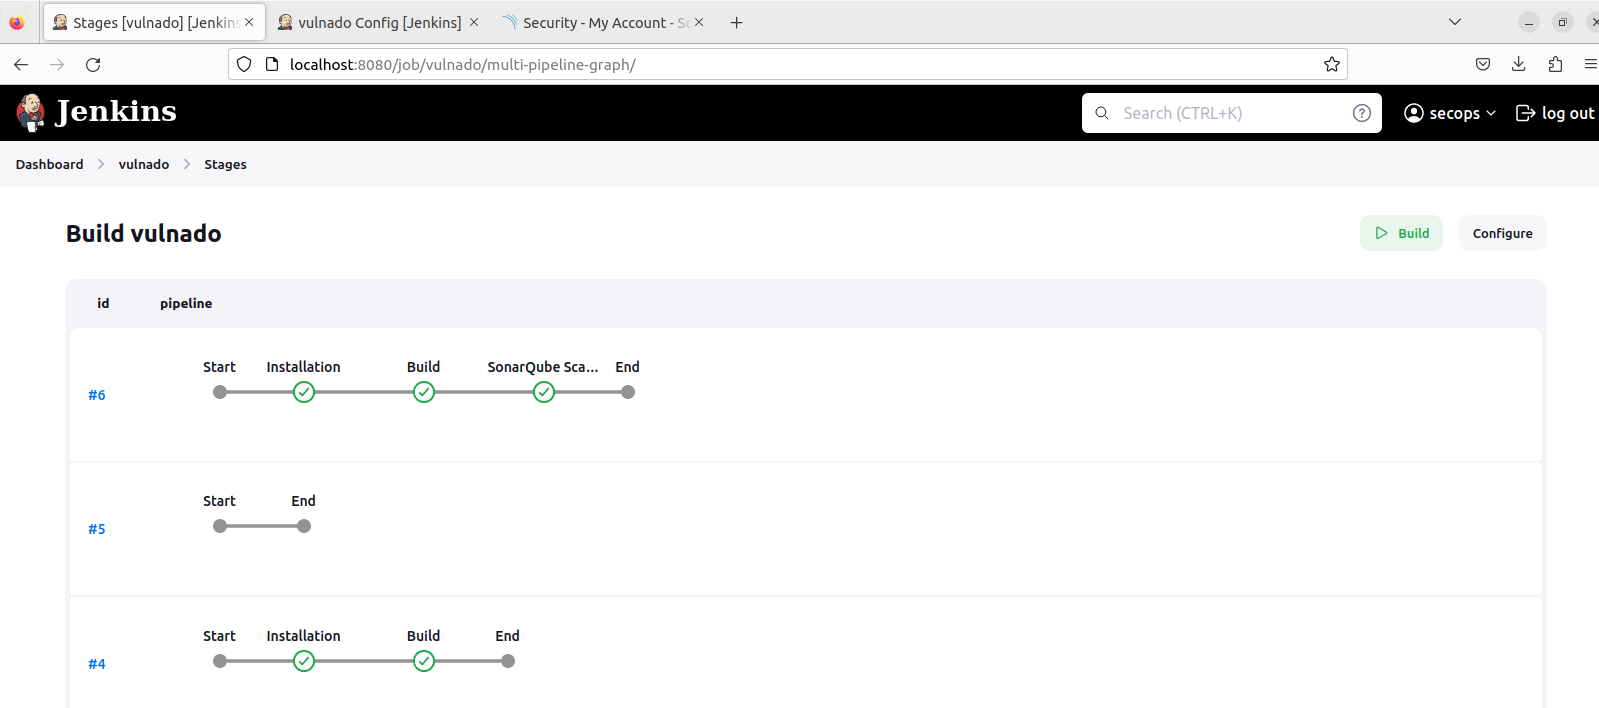
And this is how stages should look:</p>

<p><img src="/assets/images/blog/Pasted%20image%2020240326154720.png" alt="Pipeline stages" /></p>

<p>
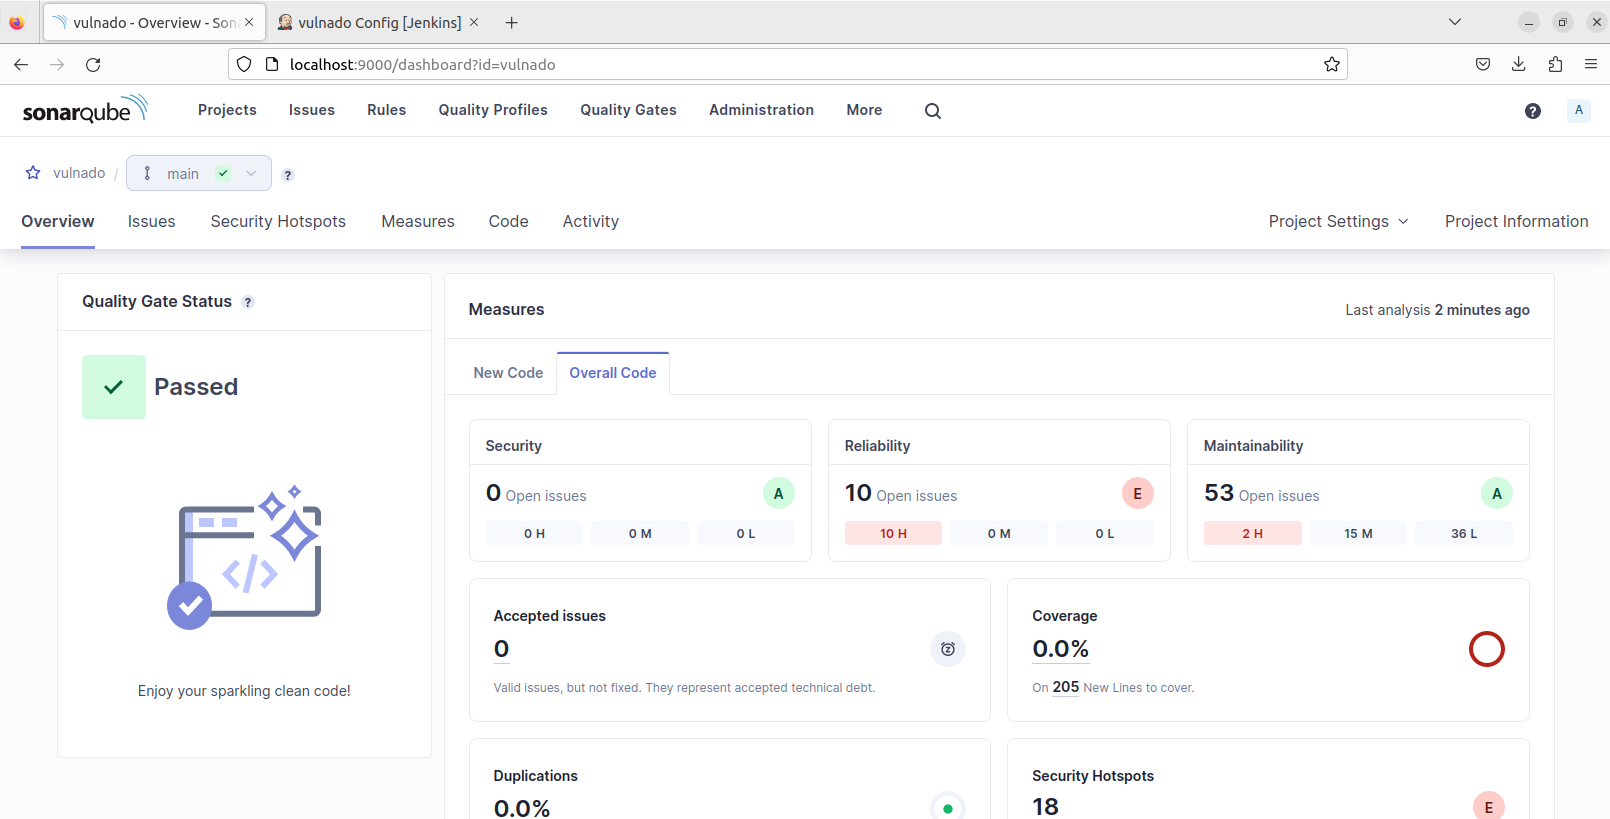
And this is the SonarQube dashboard with results:</p>

<p><img src="/assets/images/blog/Pasted%20image%2020240326154733.png" alt="SonarQube dashboard" /></p>]]></content><author><name>Akın Demir</name></author><category term="devsecops" /><category term="security" /><category term="jenkins" /><category term="sonarqube" /><category term="docker" /><category term="ci-cd" /><category term="devsecops" /><summary type="html"><![CDATA[Hands-on guide to integrating SonarQube into a Jenkins CI/CD pipeline for automated security testing, using the Vulnado vulnerable web application.]]></summary></entry><entry><title type="html">How to Install Jenkins on Linux</title><link href="https://akindemirsec.github.io/blog/2024/03/11/jenkins-installation-guide/" rel="alternate" type="text/html" title="How to Install Jenkins on Linux" /><published>2024-03-11T00:00:00+00:00</published><updated>2024-03-11T00:00:00+00:00</updated><id>https://akindemirsec.github.io/blog/2024/03/11/jenkins-installation-guide</id><content type="html" xml:base="https://akindemirsec.github.io/blog/2024/03/11/jenkins-installation-guide/"><![CDATA[<h2 id="installation">Installation</h2>

<p>Add the Jenkins repository and install:</p>

<div class="language-bash highlighter-rouge"><div class="highlight"><pre class="highlight"><code><span class="nb">sudo </span>wget <span class="nt">-O</span> /usr/share/keyrings/jenkins-keyring.asc <span class="se">\</span>
  https://pkg.jenkins.io/debian-stable/jenkins.io-2023.key
<span class="nb">echo </span>deb <span class="o">[</span>signed-by<span class="o">=</span>/usr/share/keyrings/jenkins-keyring.asc] <span class="se">\</span>
  https://pkg.jenkins.io/debian-stable binary/ | <span class="nb">sudo tee</span> <span class="se">\</span>
  /etc/apt/sources.list.d/jenkins.list <span class="o">&gt;</span> /dev/null
<span class="nb">sudo </span>apt-get update
<span class="nb">sudo </span>apt-get <span class="nb">install </span>jenkins
</code></pre></div></div>

<h2 id="access-the-web-interface">Access the Web Interface</h2>

<p>After installation, Jenkins works on <code class="language-plaintext highlighter-rouge">localhost:8080</code>:</p>

<p><img src="/assets/images/blog/Pasted%20image%2020240311001957.png" alt="Jenkins login" /></p>

<p>You can use cat command or a text editor to see the admin password (directory can change depending on your installation method):</p>

<p><img src="/assets/images/blog/Pasted%20image%2020240311002350.png" alt="Admin password" /></p>

<h2 id="initial-setup">Initial Setup</h2>

<p>After you log in and install plugins you can create admin user:</p>

<p><img src="/assets/images/blog/Pasted%20image%2020240311004103.png" alt="Create admin user" /></p>

<p>After you fill in the form, you can change port and URL of your Jenkins instance:</p>

<p><img src="/assets/images/blog/Pasted%20image%2020240311004242.png" alt="Configure URL" /></p>

<p>And here we successfully installed Jenkins:</p>

<p><img src="/assets/images/blog/Pasted%20image%2020240311004411.png" alt="Jenkins dashboard" /></p>

<h2 id="changing-the-port">Changing the Port</h2>

<p>Jenkins starts on port 8080 by default. You can change the port in the web interface but sometimes you need to start Jenkins from a different port. To do this, go to the Jenkins directory <code class="language-plaintext highlighter-rouge">/opt/jenkins/</code> or <code class="language-plaintext highlighter-rouge">/snap/jenkins</code> and run:</p>

<div class="language-bash highlighter-rouge"><div class="highlight"><pre class="highlight"><code>java <span class="nt">-jar</span> jenkins.war <span class="nt">--httpPort</span><span class="o">=</span>&lt;port_number&gt;
</code></pre></div></div>]]></content><author><name>Akın Demir</name></author><category term="devsecops" /><category term="devops" /><category term="jenkins" /><category term="linux" /><category term="ci-cd" /><category term="devops" /><summary type="html"><![CDATA[Step-by-step Jenkins installation on Debian/Ubuntu with screenshots from initial setup to the dashboard.]]></summary></entry><entry><title type="html">Volatility Command Reference</title><link href="https://akindemirsec.github.io/blog/2024/02/15/volatility-command-reference/" rel="alternate" type="text/html" title="Volatility Command Reference" /><published>2024-02-15T00:00:00+00:00</published><updated>2024-02-15T00:00:00+00:00</updated><id>https://akindemirsec.github.io/blog/2024/02/15/volatility-command-reference</id><content type="html" xml:base="https://akindemirsec.github.io/blog/2024/02/15/volatility-command-reference/"><![CDATA[<h2 id="image-profile">Image Profile</h2>

<div class="language-bash highlighter-rouge"><div class="highlight"><pre class="highlight"><code><span class="nv">$ </span>volatility <span class="nt">-f</span> &lt;example.raw&gt; imageinfo
</code></pre></div></div>

<h2 id="process-analysis">Process Analysis</h2>

<div class="language-bash highlighter-rouge"><div class="highlight"><pre class="highlight"><code><span class="c"># List processes</span>
<span class="nv">$ </span>volatility <span class="nt">-f</span> &lt;example.raw&gt; <span class="nt">--profile</span><span class="o">=</span>&lt;profile&gt; pslist

<span class="c"># Process tree</span>
<span class="nv">$ </span>volatility <span class="nt">-f</span> &lt;example.raw&gt; <span class="nt">--profile</span><span class="o">=</span>&lt;profile&gt; pstree

<span class="c"># Process scan (includes hidden/terminated)</span>
<span class="nv">$ </span>volatility <span class="nt">-f</span> &lt;example.raw&gt; <span class="nt">--profile</span><span class="o">=</span>&lt;profile&gt; psscan

<span class="c"># Generate graph visualization</span>
<span class="nv">$ </span>volatility <span class="nt">-f</span> &lt;example.raw&gt; <span class="nt">--profile</span><span class="o">=</span>&lt;profile&gt; psscan <span class="nt">--output</span><span class="o">=</span>dot <span class="nt">--output-file</span><span class="o">=</span>&lt;filename.dot&gt;

<span class="c"># Dump process</span>
<span class="nv">$ </span>volatility <span class="nt">-f</span> &lt;example.raw&gt; <span class="nt">--profile</span><span class="o">=</span>&lt;profile&gt; procdump <span class="nt">-p</span> &lt;pid&gt; <span class="nt">-D</span> &lt;output/&gt;
</code></pre></div></div>

<h2 id="command-line-artifacts">Command Line Artifacts</h2>

<div class="language-bash highlighter-rouge"><div class="highlight"><pre class="highlight"><code><span class="c"># Executed commands</span>
<span class="nv">$ </span>volatility <span class="nt">-f</span> &lt;example.raw&gt; <span class="nt">--profile</span><span class="o">=</span>&lt;profile&gt; cmdscan

<span class="c"># Console outputs</span>
<span class="nv">$ </span>volatility <span class="nt">-f</span> &lt;example.raw&gt; <span class="nt">--profile</span><span class="o">=</span>&lt;profile&gt; consoles

<span class="c"># Command line arguments (all processes)</span>
<span class="nv">$ </span>volatility <span class="nt">-f</span> &lt;example.raw&gt; <span class="nt">--profile</span><span class="o">=</span>&lt;profile&gt; cmdline

<span class="c"># Command line for specific PID</span>
<span class="nv">$ </span>volatility <span class="nt">-f</span> &lt;example.raw&gt; <span class="nt">--profile</span><span class="o">=</span>&lt;profile&gt; cmdline <span class="nt">-p</span> &lt;pid&gt;
</code></pre></div></div>

<h2 id="system-information">System Information</h2>

<div class="language-bash highlighter-rouge"><div class="highlight"><pre class="highlight"><code><span class="c"># Environment variables</span>
<span class="nv">$ </span>volatility <span class="nt">-f</span> &lt;example.raw&gt; <span class="nt">--profile</span><span class="o">=</span>&lt;profile&gt; envars

<span class="c"># NTLM password hashes</span>
<span class="nv">$ </span>volatility <span class="nt">-f</span> &lt;example.raw&gt; <span class="nt">--profile</span><span class="o">=</span>&lt;profile&gt; hashdump
</code></pre></div></div>

<h2 id="network">Network</h2>

<div class="language-bash highlighter-rouge"><div class="highlight"><pre class="highlight"><code><span class="nv">$ </span>volatility <span class="nt">-f</span> &lt;example.raw&gt; <span class="nt">--profile</span><span class="o">=</span>&lt;profile&gt; netscan
</code></pre></div></div>

<h2 id="dll--module-analysis">DLL &amp; Module Analysis</h2>

<div class="language-bash highlighter-rouge"><div class="highlight"><pre class="highlight"><code><span class="c"># List loaded DLLs</span>
<span class="nv">$ </span>volatility <span class="nt">-f</span> &lt;example.raw&gt; <span class="nt">--profile</span><span class="o">=</span>&lt;profile&gt; dlllist <span class="nt">-p</span> &lt;pid&gt;

<span class="c"># Dump specific DLL</span>
<span class="nv">$ </span>volatility <span class="nt">-f</span> &lt;example.raw&gt; <span class="nt">--profile</span><span class="o">=</span>&lt;profile&gt; dlldump <span class="nt">-p</span> &lt;pid&gt; <span class="nt">-b</span> &lt;base_address&gt; <span class="nt">-D</span> &lt;output_directory&gt;
</code></pre></div></div>

<h2 id="registry">Registry</h2>

<div class="language-bash highlighter-rouge"><div class="highlight"><pre class="highlight"><code><span class="nv">$ </span>volatility <span class="nt">-f</span> &lt;example.raw&gt; <span class="nt">--profile</span><span class="o">=</span>&lt;profile&gt; dumpregistry <span class="nt">-D</span> &lt;output_directory&gt;
</code></pre></div></div>

<h2 id="file-operations">File Operations</h2>

<div class="language-bash highlighter-rouge"><div class="highlight"><pre class="highlight"><code><span class="c"># Scan for files</span>
<span class="nv">$ </span>volatility <span class="nt">-f</span> &lt;example.raw&gt; <span class="nt">--profile</span><span class="o">=</span>&lt;profile&gt; filescan | <span class="nb">grep</span> &lt;filename&gt;

<span class="c"># Extract file from memory</span>
<span class="nv">$ </span>volatility <span class="nt">-f</span> &lt;example.raw&gt; <span class="nt">--profile</span><span class="o">=</span>&lt;profile&gt; dumpfiles <span class="nt">-Q</span> &lt;dataoffset&gt; <span class="nt">-D</span> &lt;output-directory&gt;
</code></pre></div></div>

<p>Change file extension after extracting based on actual file type.</p>

<h2 id="memory-analysis">Memory Analysis</h2>

<div class="language-bash highlighter-rouge"><div class="highlight"><pre class="highlight"><code><span class="c"># Extract process memory (change extension to .data)</span>
<span class="nv">$ </span>volatility <span class="nt">-f</span> &lt;example.raw&gt; <span class="nt">--profile</span><span class="o">=</span>&lt;profile&gt; memdump <span class="nt">-p</span> &lt;pid&gt; <span class="nt">-D</span> &lt;output&gt;

<span class="c"># List handles</span>
<span class="nv">$ </span>volatility <span class="nt">-f</span> &lt;example.raw&gt; <span class="nt">--profile</span><span class="o">=</span>&lt;profile&gt; handles <span class="nt">-p</span> &lt;pid&gt; <span class="nt">-t</span> &lt;<span class="nb">type</span><span class="o">&gt;</span>
<span class="c"># Types: mutant, process, file, key, etc.</span>

<span class="c"># Find injected code / suspicious memory allocations</span>
<span class="nv">$ </span>volatility <span class="nt">-f</span> &lt;example.raw&gt; <span class="nt">--profile</span><span class="o">=</span>&lt;profile&gt; malfind <span class="nt">-p</span> &lt;pid&gt;

<span class="c"># Dump memory region</span>
<span class="nv">$ </span>volatility <span class="nt">-f</span> &lt;example.raw&gt; <span class="nt">--profile</span><span class="o">=</span>&lt;profile&gt; vaddump <span class="nt">-b</span> &lt;base_address&gt; <span class="nt">-D</span> &lt;output_directory&gt;
</code></pre></div></div>

<h2 id="yara-scanning">Yara Scanning</h2>

<div class="language-bash highlighter-rouge"><div class="highlight"><pre class="highlight"><code><span class="nv">$ </span>volatility <span class="nt">-f</span> &lt;example.raw&gt; <span class="nt">--profile</span><span class="o">=</span>&lt;profile&gt; yarascan <span class="nt">-Y</span> <span class="s2">"&lt;yara_rule&gt;"</span>
</code></pre></div></div>

<h2 id="browser-artifacts">Browser Artifacts</h2>

<div class="language-bash highlighter-rouge"><div class="highlight"><pre class="highlight"><code><span class="c"># Chrome history (requires volatility-plugins)</span>
<span class="c"># Download: https://github.com/superponible/volatility-plugins</span>
<span class="nv">$ </span>volatility <span class="nt">--plugins</span><span class="o">=</span>plugins/ <span class="nt">-f</span> &lt;example.raw&gt; <span class="nt">--profile</span><span class="o">=</span>&lt;profile&gt; chromehistory <span class="o">&gt;</span> &lt;output_file&gt;

<span class="c"># IE history</span>
<span class="nv">$ </span>volatility <span class="nt">-f</span> &lt;example.raw&gt; <span class="nt">--profile</span><span class="o">=</span>&lt;profile&gt; iehistory
</code></pre></div></div>

<p>Alternative: extract browser history file and open it in SQLite.</p>

<h2 id="quick-reference">Quick Reference</h2>

<table>
  <thead>
    <tr>
      <th>Command</th>
      <th>Purpose</th>
    </tr>
  </thead>
  <tbody>
    <tr>
      <td><code class="language-plaintext highlighter-rouge">imageinfo</code></td>
      <td>Identify image profile</td>
    </tr>
    <tr>
      <td><code class="language-plaintext highlighter-rouge">pslist</code></td>
      <td>List processes</td>
    </tr>
    <tr>
      <td><code class="language-plaintext highlighter-rouge">pstree</code></td>
      <td>Process tree view</td>
    </tr>
    <tr>
      <td><code class="language-plaintext highlighter-rouge">psscan</code></td>
      <td>Find all processes (including hidden)</td>
    </tr>
    <tr>
      <td><code class="language-plaintext highlighter-rouge">cmdscan</code></td>
      <td>Extract command history</td>
    </tr>
    <tr>
      <td><code class="language-plaintext highlighter-rouge">consoles</code></td>
      <td>Console output history</td>
    </tr>
    <tr>
      <td><code class="language-plaintext highlighter-rouge">envars</code></td>
      <td>Environment variables</td>
    </tr>
    <tr>
      <td><code class="language-plaintext highlighter-rouge">hashdump</code></td>
      <td>Dump password hashes</td>
    </tr>
    <tr>
      <td><code class="language-plaintext highlighter-rouge">netscan</code></td>
      <td>Network connections</td>
    </tr>
    <tr>
      <td><code class="language-plaintext highlighter-rouge">filescan</code></td>
      <td>Scan for files in memory</td>
    </tr>
    <tr>
      <td><code class="language-plaintext highlighter-rouge">dumpfiles</code></td>
      <td>Extract files</td>
    </tr>
    <tr>
      <td><code class="language-plaintext highlighter-rouge">dlllist</code></td>
      <td>Loaded modules</td>
    </tr>
    <tr>
      <td><code class="language-plaintext highlighter-rouge">malfind</code></td>
      <td>Find injected code</td>
    </tr>
    <tr>
      <td><code class="language-plaintext highlighter-rouge">mftparser</code></td>
      <td>Export NTFS MFT</td>
    </tr>
    <tr>
      <td><code class="language-plaintext highlighter-rouge">yarascan</code></td>
      <td>Scan with Yara rules</td>
    </tr>
  </tbody>
</table>]]></content><author><name>Akın Demir</name></author><category term="forensics" /><category term="tools" /><category term="volatility" /><category term="memory-forensics" /><category term="cheatsheet" /><summary type="html"><![CDATA[Quick reference for Volatility memory forensics commands - from image profiling to process analysis, credential extraction, and browser artifact recovery.]]></summary></entry><entry><title type="html">MemLabs Lab 5 - The Strange Files</title><link href="https://akindemirsec.github.io/blog/2024/01/21/memlabs-5-writeup/" rel="alternate" type="text/html" title="MemLabs Lab 5 - The Strange Files" /><published>2024-01-21T00:00:00+00:00</published><updated>2024-01-21T00:00:00+00:00</updated><id>https://akindemirsec.github.io/blog/2024/01/21/memlabs-5-writeup</id><content type="html" xml:base="https://akindemirsec.github.io/blog/2024/01/21/memlabs-5-writeup/"><![CDATA[<h2 id="challenge-description">Challenge Description</h2>

<p>We received this memory dump from our client recently. Someone accessed his system when he was not there and he found some rather strange files being accessed. Find those files and they might be useful.</p>

<blockquote>
  <p>“The names were not readable. They were composed of alphabets and numbers but I wasn’t able to make out what exactly it was.”</p>
</blockquote>

<p>Also, he noticed his most loved application that he always used crashed every time he ran it. Was it a virus?</p>

<p><strong>Note-1:</strong> This challenge is composed of 3 flags.<br />
<strong>Note-2:</strong> There was a small mistake when making this challenge. If you find any string which has <code class="language-plaintext highlighter-rouge">L4B_3_D0n3!!</code> in it, please change it to <code class="language-plaintext highlighter-rouge">L4B_5_D0n3!!</code> and then proceed.<br />
<strong>Note-3:</strong> You’ll get the stage 2 flag only when you have the stage 1 flag.</p>

<hr />

<h2 id="solution">Solution</h2>

<h3 id="stage-1-encrypted-file-names">Stage 1: Encrypted File Names</h3>

<p>First step let’s get the image info:</p>

<p><img src="/assets/images/blog/Pasted%20image%2020240121054613.png" alt="imageinfo" /></p>

<p>In second step I use pslist command for listing processes and I found these suspicious processes for now:</p>

<p><img src="/assets/images/blog/Pasted%20image%2020240121055059.png" alt="suspicious processes" /></p>

<p>cmdscan and consoles commands didn’t show anything. Then I used pstree command and I can see that some of our suspicious processes TCPSVCS.exe and WerFault.exe were triggered by services.exe.</p>

<p>With cmdline command I found a RAR file, I am going to try to dump this file.</p>

<p>Here I found and dumped the file.</p>

<p>Okey this RAR archive is password protected. I will use envars command.</p>

<p>envars command and some other commands don’t help with the password but I found a file with iehistory command. The name of this file looks like an encrypted string - let’s decode it:</p>

<p><img src="/assets/images/blog/Pasted%20image%2020240121060835.png" alt="iehistory encoded filename" /></p>

<p>And here! There is a flag: <strong><code class="language-plaintext highlighter-rouge">flag{!!_w3LL_d0n3_St4g3-1_0f_L4B_5_D0n3_!!}</code></strong></p>

<p>The description says that there are 3 flags in this lab and we cannot pass to the 2nd stage without the first flag. If we are lucky this is the first flag:</p>

<p><img src="/assets/images/blog/Pasted%20image%2020240121061309.png" alt="flag decoded" /></p>

<h3 id="stage-2-the-rar-archive">Stage 2: The RAR Archive</h3>

<p>Yes! The first flag is the password for the RAR archive:</p>

<p><img src="/assets/images/blog/Pasted%20image%2020240121061838.png" alt="rar extracted" /></p>

<p>There was only an image file in the RAR archive and I find the second flag but description says we have one more flag:</p>

<p><img src="/assets/images/blog/Pasted%20image%2020240121061927.png" alt="second flag" /></p>

<h3 id="stage-3-reverse-engineering">Stage 3: Reverse Engineering</h3>

<p>For the last stage I am going to investigate another suspicious process - NOTEPAD.exe.</p>

<p>I found and dumped the suspicious exe and here I dumped 3 files.</p>

<p>file.dat was the file we were looking for. This was actually an .exe file. So I tried to analyze it. I used different PE analysis tools, string scanning tools and Detect-It-Easy but I couldn’t find anything. After these attempts I decided to start reverse engineering. After spending some time in Ghidra and IDA Free I found the flag with IDA Graph View.</p>

<p>The last flag was: <strong><code class="language-plaintext highlighter-rouge">bios{M3m_l4B5_OVeR_!}</code></strong></p>

<h2 id="key-takeaways">Key Takeaways</h2>

<ul>
  <li>IE history (<code class="language-plaintext highlighter-rouge">iehistory</code> plugin) can reveal interesting file access patterns</li>
  <li>Encrypted/encoded file names are worth decoding - they might contain flags</li>
  <li>Flags from earlier stages can serve as passwords for later stages</li>
  <li>When standard forensics tools fail, reverse engineering (IDA/Ghidra) can reveal hidden strings in executables</li>
  <li>Dumped process memory can contain executable files disguised with different extensions</li>
</ul>]]></content><author><name>Akın Demir</name></author><category term="forensics" /><category term="ctf" /><category term="volatility" /><category term="memory-forensics" /><category term="ctf-writeup" /><category term="memlabs" /><category term="reverse-engineering" /><category term="ghidra" /><summary type="html"><![CDATA[MemLabs Lab 5 walkthrough - a 3-stage challenge involving encrypted file names, password-protected RAR archives, and reverse engineering with IDA/Ghidra.]]></summary></entry><entry><title type="html">MemLabs Lab 6 - The Underworld Gangster</title><link href="https://akindemirsec.github.io/blog/2024/01/21/memlabs-6-writeup/" rel="alternate" type="text/html" title="MemLabs Lab 6 - The Underworld Gangster" /><published>2024-01-21T00:00:00+00:00</published><updated>2024-01-21T00:00:00+00:00</updated><id>https://akindemirsec.github.io/blog/2024/01/21/memlabs-6-writeup</id><content type="html" xml:base="https://akindemirsec.github.io/blog/2024/01/21/memlabs-6-writeup/"><![CDATA[<h2 id="challenge-description">Challenge Description</h2>

<p>We received this memory dump from the Intelligence Bureau Department. They say this evidence might hold some secrets of the underworld gangster David Benjamin. This memory dump was taken from one of his workers whom the FBI busted earlier this week. Your job is to go through the memory dump and see if you can figure something out. FBI also says that David communicated with his workers via the internet so that might be a good place to start.</p>

<p><strong>Note:</strong> This challenge is composed of 1 flag split into 2 parts.<br />
The flag format for this lab is: <code class="language-plaintext highlighter-rouge">inctf{s0me_l33t_Str1ng}</code></p>

<hr />

<h2 id="solution">Solution</h2>

<p>The description made me very excited. So let’s start!</p>

<h3 id="browser-investigation">Browser Investigation</h3>

<p>First step let’s get the image info.</p>

<p>Then I listed the processes with pslist command. chrome.exe, firefox.exe and WinRAR.exe are the suspicious ones that we will focus on for now. The description says that the suspect communicates over the internet, so I will analyze more about browser history and network traffic.</p>

<p>But before things about internet - let’s check the RAR files to see what suspect did on WinRAR:</p>

<p><img src="/assets/images/blog/image.png" alt="WinRAR files" /></p>

<p>I dumped it and tried to unrar but it was password protected and there was no clue so we will go back to it later. In the description it says <em>“This challenge is composed of 1 flag split into 2 parts.”</em> So I believe that the password of this RAR archive is the first part of the flag.</p>

<h3 id="chrome-and-firefox-history">Chrome and Firefox History</h3>

<p>So let’s look what the suspect did on the internet. We can scan network and also dump browser histories.</p>

<p>Okey this is the Google Chrome history but where is Firefox history?</p>

<p>After some searching I found an article about where Firefox history is stored.</p>

<p>Now let’s dump and analyze these browser histories.</p>

<p>You can open browser histories with DB Browser. First I chose Chrome history and there was literally nothing… Just some searches about cars and stuff and download history of WinRAR (from official website).</p>

<p>So let’s check the Firefox history, and there are encoded texts and different mails about a Mega Drive Key.</p>

<p>Okey.. I couldn’t find anything about these encoded texts. I went back to look at Chrome history and I realized I had missed something.</p>

<p>This is the note in the URL:</p>

<p><img src="/assets/images/blog/Pasted%20image%2020240121081849.png" alt="note in URL" /></p>

<p>And this is the document which URL is given in the note. The text in this document is only Lorem Ipsum (Lorem Ipsum is a meaningless block of text used as placeholder in design templates).</p>

<p>But there is a Mega link hidden in this Lorem Ipsum. Now we have a key and a Mega link.</p>

<p>When we go to this link Mega asks us for a key. The text that I thought was encrypted is actually the key to this file. And there is just one file in the link: “flag.png”. But as you can see we can’t open this file as an image.</p>

<h3 id="the-rar-archive">The RAR Archive</h3>

<p>Now let’s go back to the password protected RAR archive. I tried to scan files about “password” but there was no result so I tried to use envars command and there it is.. I can’t believe how easy it is:</p>

<p><img src="/assets/images/blog/img2.png" alt="envars password" /></p>

<p>This is the file in the password protected RAR archive. This is the second part of our flag:</p>

<p><img src="/assets/images/blog/Pasted%20image%2020240121084043.png" alt="second part of flag" /></p>

<h3 id="fixing-the-corrupted-png">Fixing the Corrupted PNG</h3>

<p>Yes.. we still have a password protected image file and there is no clue. Also there was another big problem. Steghide throws an error about file format:</p>

<p><img src="/assets/images/blog/Pasted%20image%2020240121084828.png" alt="steghide error" /></p>

<p>When I use exiftool I can see the problem but I couldn’t understand what exactly is the issue:</p>

<p><img src="/assets/images/blog/img3.png" alt="exiftool output" /></p>

<p>After some googling (like 3 seconds) I understood the problem and I know how to solve it. I am going to change hex data:</p>

<p><img src="/assets/images/blog/img4.png" alt="hex editor" /></p>

<p>Every file format has a hexadecimal text palette called “magic number” in IT. If you change those hexadecimal file signs you will change the format of file. This method is also used by attackers for unauthorized file uploads.</p>

<p>So when we go back to our file there is just a small problem, small enough to be annoying. As you can see there is written “iHDR” - it should be “IHDR”:</p>

<p><img src="/assets/images/blog/Pasted%20image%2020240121090529.png" alt="iHDR vs IHDR" /></p>

<p>There was written 69 (<code class="language-plaintext highlighter-rouge">i</code> in ASCII table) - I changed it to 49 (<code class="language-plaintext highlighter-rouge">I</code> in ASCII table).</p>

<p>And here it is, the file actually wasn’t password protected - it was just broken:</p>

<p><img src="/assets/images/blog/Pasted%20image%2020240121091159.png" alt="fixed PNG - final flag" /></p>

<p><strong>Final flag: <code class="language-plaintext highlighter-rouge">inctf{thi5_cH4LL3Ng3_!s_g0nn4_b3_?_aN_Am4zINg_!_i_gU3Ss???}</code></strong></p>

<h2 id="key-takeaways">Key Takeaways</h2>

<ul>
  <li>Always analyze ALL browser histories (Chrome, Firefox, etc.) - don’t skip any</li>
  <li>Browser history databases can be opened with SQLite/DB Browser</li>
  <li>Lorem Ipsum text can hide embedded links</li>
  <li>PNG files have magic bytes with specific header requirements (<code class="language-plaintext highlighter-rouge">IHDR</code> not <code class="language-plaintext highlighter-rouge">iHDR</code>)</li>
  <li>A single byte change in hex can corrupt or fix an entire file</li>
  <li>Environment variables remain a goldmine for hidden information</li>
</ul>]]></content><author><name>Akın Demir</name></author><category term="forensics" /><category term="ctf" /><category term="volatility" /><category term="memory-forensics" /><category term="ctf-writeup" /><category term="memlabs" /><category term="browser-forensics" /><category term="hex-editing" /><summary type="html"><![CDATA[MemLabs Lab 6 walkthrough - investigating browser histories across Chrome and Firefox, fixing corrupted PNG files, and analyzing Mega cloud links.]]></summary></entry><entry><title type="html">MemLabs Lab 3 - The Evil Script</title><link href="https://akindemirsec.github.io/blog/2024/01/14/memlabs-3-writeup/" rel="alternate" type="text/html" title="MemLabs Lab 3 - The Evil Script" /><published>2024-01-14T00:00:00+00:00</published><updated>2024-01-14T00:00:00+00:00</updated><id>https://akindemirsec.github.io/blog/2024/01/14/memlabs-3-writeup</id><content type="html" xml:base="https://akindemirsec.github.io/blog/2024/01/14/memlabs-3-writeup/"><![CDATA[<h2 id="challenge-description">Challenge Description</h2>

<p>A malicious script encrypted a very secret piece of information I had on my system. Can you recover the information for me please?</p>

<p><strong>Note-1:</strong> This challenge is composed of only 1 flag. The flag split into 2 parts.<br />
<strong>Note-2:</strong> You’ll need the first half of the flag to get the second.<br />
You will need this additional tool: <code class="language-plaintext highlighter-rouge">sudo apt install steghide</code><br />
The flag format for this lab is: <code class="language-plaintext highlighter-rouge">inctf{s0me_l33t_Str1ng}</code></p>

<hr />

<h2 id="solution">Solution</h2>

<h3 id="part-1-the-xor-script">Part 1: The XOR Script</h3>

<p>First step let’s get the image info:</p>

<p><img src="/assets/images/blog/Pasted%20image%2020240114061759.png" alt="imageinfo" /></p>

<p>Then check the processes:</p>

<p><img src="/assets/images/blog/Pasted%20image%2020240114062152.png" alt="pslist" /></p>

<p>I noted the processes I think suspicious:</p>

<p><img src="/assets/images/blog/Pasted%20image%2020240114062237.png" alt="suspicious processes" /></p>

<p>After I check cmd commands with cmdline:</p>

<p><img src="/assets/images/blog/Pasted%20image%2020240114062747.png" alt="cmdline" /></p>

<p>And here there are 2 suspicious commands:</p>

<p><img src="/assets/images/blog/Pasted%20image%2020240114062832.png" alt="suspicious commands" /></p>

<p>Let’s try to extract these 2 files - evilscript.py and vip.txt:</p>

<p><img src="/assets/images/blog/Pasted%20image%2020240114063556.png" alt="extract files" /></p>

<p>This is the evilscript.py - as you can see this code XOR encrypts the vip.txt and encodes it with Base64.</p>

<p>And this is the vip.txt:</p>

<p><img src="/assets/images/blog/Pasted%20image%2020240114064154.png" alt="vip.txt content" /></p>

<p>After decoding it with CyberChef I got something. Key 3 is in the format of our flag:</p>

<p><img src="/assets/images/blog/Pasted%20image%2020240114064244.png" alt="cyberchef decode" /></p>

<h3 id="part-2-steganography">Part 2: Steganography</h3>

<p>After that, in the CTF challenge it says we will need to use steghide so I am going to search for some images.</p>

<p>First I checked for .png file extension which is a popular image file extension, and I got a lot of files but these files are not what we’re searching for:</p>

<p><img src="/assets/images/blog/Pasted%20image%2020240114064921.png" alt="png search" /></p>

<p>Then I checked .jpeg file extension. And here there is a file named “suspision1.jpeg”. I know that this looks fake but don’t forget that this is a CTF:</p>

<p><img src="/assets/images/blog/Pasted%20image%2020240114065309.png" alt="jpeg search" /></p>

<p>Then I extracted the file. As you can see this image looks like a random footage but in the challenge description creator said we need to use steghide:</p>

<p><img src="/assets/images/blog/Pasted%20image%2020240114065634.png" alt="extracted jpeg" /></p>

<p>When we try to extract file with steghide we see there is a passphrase. While doing some bruteforce tries, I checked the description again and saw: “Note-2: You’ll need the first half of the flag to get the second.”</p>

<p><img src="/assets/images/blog/Pasted%20image%2020240114070428.png" alt="steghide passphrase" /></p>

<p>The passphrase is the first part of the flag: <code class="language-plaintext highlighter-rouge">inctf{0n3_h4lf</code></p>

<p>We extracted the file, and there it is - the second part of the flag.</p>

<p><strong>Final flag: <code class="language-plaintext highlighter-rouge">inctf{0n3_h4lf_1s_n0t_3n0ugh}</code></strong></p>

<h2 id="key-takeaways">Key Takeaways</h2>

<ul>
  <li>Python scripts found in memory can reveal encryption methods used</li>
  <li>CyberChef is great for chaining multiple decode operations (XOR + Base64)</li>
  <li>Steganography tools like steghide can hide data inside JPEG images</li>
  <li>Challenge descriptions contain critical hints - always read them carefully</li>
</ul>]]></content><author><name>Akın Demir</name></author><category term="forensics" /><category term="ctf" /><category term="volatility" /><category term="memory-forensics" /><category term="ctf-writeup" /><category term="memlabs" /><category term="steghide" /><category term="xor" /><summary type="html"><![CDATA[MemLabs Lab 3 walkthrough - decrypting XOR-encoded secrets and using steganography to recover hidden data from JPEG images.]]></summary></entry><entry><title type="html">MemLabs Lab 4 - The Deleted File</title><link href="https://akindemirsec.github.io/blog/2024/01/14/memlabs-4-writeup/" rel="alternate" type="text/html" title="MemLabs Lab 4 - The Deleted File" /><published>2024-01-14T00:00:00+00:00</published><updated>2024-01-14T00:00:00+00:00</updated><id>https://akindemirsec.github.io/blog/2024/01/14/memlabs-4-writeup</id><content type="html" xml:base="https://akindemirsec.github.io/blog/2024/01/14/memlabs-4-writeup/"><![CDATA[<h2 id="challenge-description">Challenge Description</h2>

<p>My system was recently compromised. The Hacker stole a lot of information but he also deleted a very important file of mine. I have no idea on how to recover it. The only evidence we have, at this point of time is this memory dump. Please help me.</p>

<p><strong>Note:</strong> This challenge is composed of only 1 flag.<br />
The flag format for this lab is: <code class="language-plaintext highlighter-rouge">inctf{s0me_l33t_Str1ng}</code></p>

<hr />

<h2 id="solution">Solution</h2>

<p>First step let’s get the image info.</p>

<p>Then I checked processes, but I didn’t see any suspicious processes except of StickyNot.exe and dllhost.exe.</p>

<p>After that I use cmdscan command but I didn’t get anything suspicious then I use cmdline command and I get something about “dllhost.exe”.</p>

<p>Then I used consoles command but there was nothing suspicious. After that I tried to get deeper for StickyNot.exe but there was nothing. After some failures I tried to search some files and here - there is a file named Important.txt:</p>

<p><img src="/assets/images/blog/Pasted%20image%2020240114075855.png" alt="Important.txt found" /></p>

<p>And let’s dump it.. what? Okey - dumpfiles command can’t extract the file:</p>

<p><img src="/assets/images/blog/Pasted%20image%2020240114080143.png" alt="dumpfiles failed" /></p>

<p>After some searches about Windows forensics I find something interesting. In NTFS (New Technology File System) there is a table named MFT - Master File Table. MFT contains information about files: where the file is, data in the file, and metadata information. I wish I had known this until today.</p>

<p>And the best part about this: Volatility can export MFT! (This process can take minutes)</p>

<p>The exported txt file was 9.5 MB and 173544 lines… Okey let’s open it in a text editor and try to find something about Important.txt.</p>

<p>And this is what we got about Important.txt - luckily I have some experience in Malware Analysis so I’m a bit used to screens like this. This is just hexdump - you can read it easily or you can decode it.</p>

<p>Finally the flag is:</p>

<p><strong><code class="language-plaintext highlighter-rouge">inctf{1_is_n0t_EQu4l_7o_2bUt_th1s_d0s3nt_m4ke_s3ns3}</code></strong></p>

<h2 id="key-takeaways">Key Takeaways</h2>

<ul>
  <li>When dumpfiles command fails, the file might be in MFT (Master File Table)</li>
  <li>NTFS stores small files directly in the MFT record - these can be recovered even when the file itself is “deleted”</li>
  <li>Volatility’s <code class="language-plaintext highlighter-rouge">mftparser</code> plugin exports the entire MFT - grep through it for your target</li>
  <li>Reading hexdump is a useful skill for forensic analysts</li>
</ul>]]></content><author><name>Akın Demir</name></author><category term="forensics" /><category term="ctf" /><category term="volatility" /><category term="memory-forensics" /><category term="ctf-writeup" /><category term="memlabs" /><category term="mft" /><category term="ntfs" /><summary type="html"><![CDATA[MemLabs Lab 4 walkthrough - recovering a deleted file by exporting the NTFS Master File Table (MFT) from a memory dump.]]></summary></entry><entry><title type="html">MemLabs Lab 0 - First Steps</title><link href="https://akindemirsec.github.io/blog/2024/01/12/memlabs-0-writeup/" rel="alternate" type="text/html" title="MemLabs Lab 0 - First Steps" /><published>2024-01-12T00:00:00+00:00</published><updated>2024-01-12T00:00:00+00:00</updated><id>https://akindemirsec.github.io/blog/2024/01/12/memlabs-0-writeup</id><content type="html" xml:base="https://akindemirsec.github.io/blog/2024/01/12/memlabs-0-writeup/"><![CDATA[<p><a href="https://github.com/stuxnet999/MemLabs">MemLabs</a> is an educational set of CTF-styled challenges aimed to get people started with memory forensics. Thanks <a href="https://github.com/stuxnet999">Stuxnet999</a> for creating this!</p>

<h2 id="challenge-description">Challenge Description</h2>

<p>My friend John is an “environmental” activist and a humanitarian. He hated the ideology of Thanos from the Avengers: Infinity War. He sucks at programming. He used too many variables while writing any program. One day, John gave me a memory dump and asked me to find out what he was doing while he took the dump. Can you figure it out for me?</p>

<hr />

<h2 id="solution">Solution</h2>

<p>First get the image info:</p>

<p><img src="/assets/images/blog/Pasted%20image%2020240112160738.png" alt="imageinfo" /></p>

<p>Then I use pslist command to list processes and take notes about suspicious processes.</p>

<p>After that I use cmdscan command to search what happened in cmd.exe. And there seen a python file executed with cmd:</p>

<p><img src="/assets/images/blog/Pasted%20image%2020240112160738.png" alt="cmdscan" /></p>

<p>To search what was the output I used consoles command, and there is seen an encoded text as output of executed python file. But when I tried to decode it I didn’t get any normal text just random characters.</p>

<p><img src="/assets/images/blog/Pasted%20image%2020240112160938.png" alt="consoles output" /></p>

<p>So I tried to use envars command to scan environment variables. And there is a clue - a “Thanos” variable with “xor and password” value:</p>

<p><img src="/assets/images/blog/Pasted%20image%2020240112161808.png" alt="envars - Thanos variable" /></p>

<p>After decode the text with the right way in second attempt it gives us a string <code class="language-plaintext highlighter-rouge">1_4m_b3tt3r</code>. Okey this should be something but this is not the flag.</p>

<p>We decoded the text with XOR but we didn’t see any passwords so I use hashdump command to get NTLM hashes:</p>

<p><img src="/assets/images/blog/Pasted%20image%2020240112163357.png" alt="hashdump" /></p>

<p>Then I used hashcat for cracking hash. Also online tools can be very useful for cracking NTLM hashes.</p>

<p><img src="/assets/images/blog/Pasted%20image%2020240112163506.png" alt="hashcat result" /></p>

<p>Finally when you combine these two texts the flag is:</p>

<p><strong><code class="language-plaintext highlighter-rouge">flag{you_are_good_but1_4m_b3tt3r}</code></strong></p>

<h2 id="key-takeaways">Key Takeaways</h2>

<ul>
  <li>Environment variables can hold critical clues</li>
  <li>Combining multiple data sources (consoles, envars, hashdump) is essential</li>
  <li>Understanding encoding methods (XOR) matters in CTF challenges</li>
</ul>]]></content><author><name>Akın Demir</name></author><category term="forensics" /><category term="ctf" /><category term="volatility" /><category term="memory-forensics" /><category term="ctf-writeup" /><category term="memlabs" /><summary type="html"><![CDATA[My walkthrough of MemLabs Lab 0 - using environment variables, XOR decoding, and NTLM hash cracking to find the flag.]]></summary></entry></feed>